How To: Intermittent Digital Odometer Repair 99-03
#1
 01-23-2010, 04:39 PM


How To: Intermittent Digital Odometer Repair 99-03
Well since removing the cluster has already been well documented on this site we will pick up where Raptor left off, and repair the odometer display, intermittent inoperative concern.
How to remove dash pieces in Raptor's write up: https://www.f150online.com/forums/ar...r-97-03-a.html
Technically this write up has been done before but i have some larger pictures and more information (old link from 2003) https://www.f150online.com/forums/el...er-repair.html
Work was performed on a 1999 F150 but should be similar on all 1999-2003s
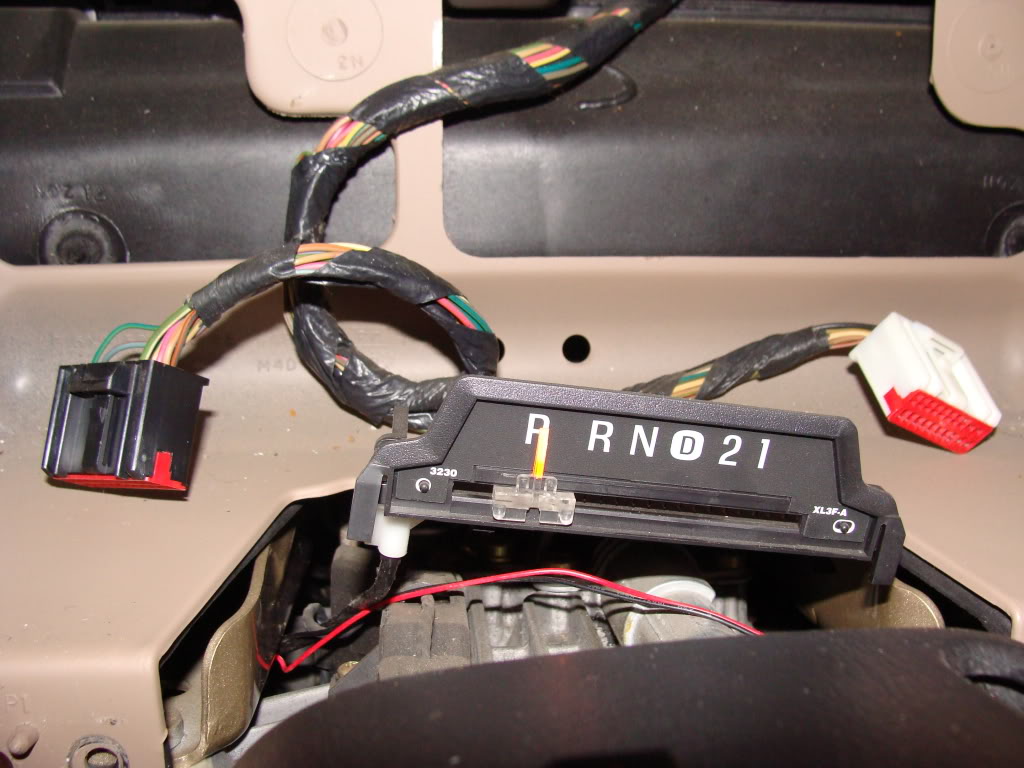
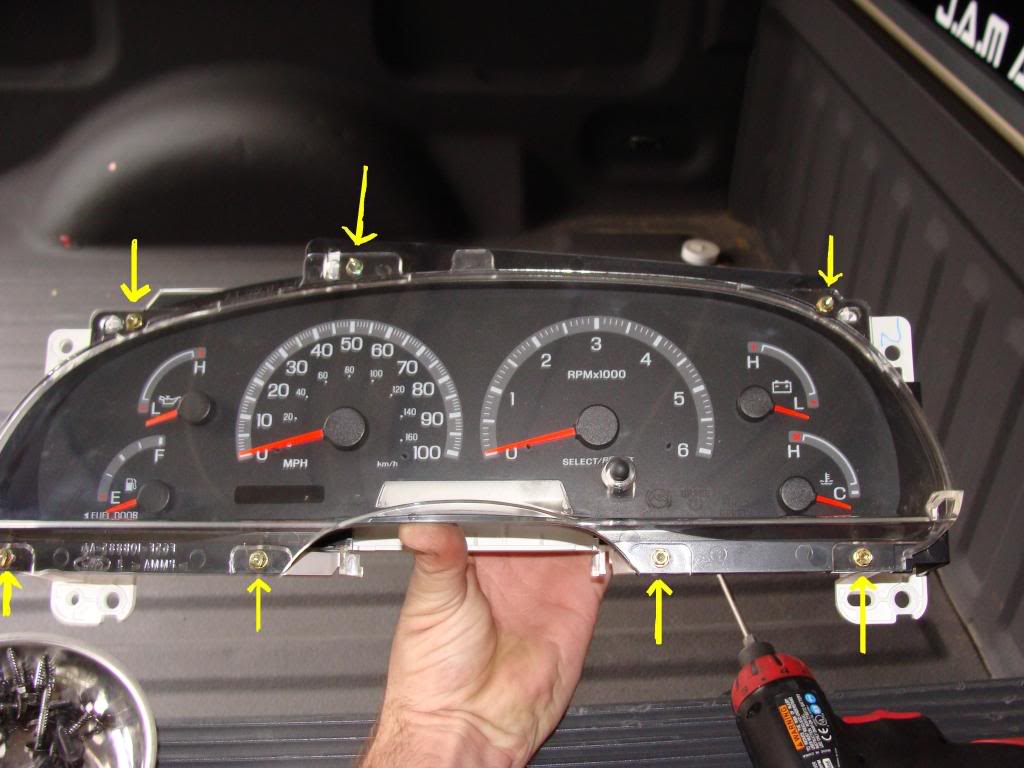
Anyways, start by removing the cluster
Be very careful not to break the little black clips that hold the gear indicator to the bottom of the cluster. Spread the clips out forward and backwords, and slide the indicator down.
Next dissasemble the back of the cluster, taking out the screws (I believe they are T10 possibly a T15)
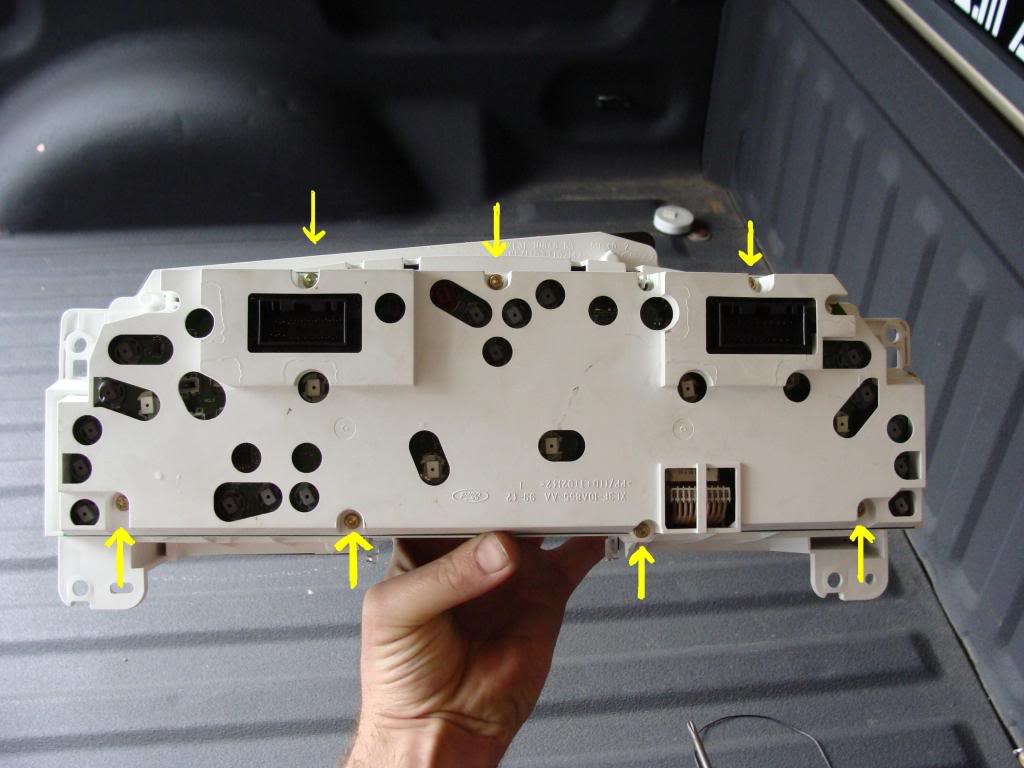
Take note of the trip odometer selection button's location
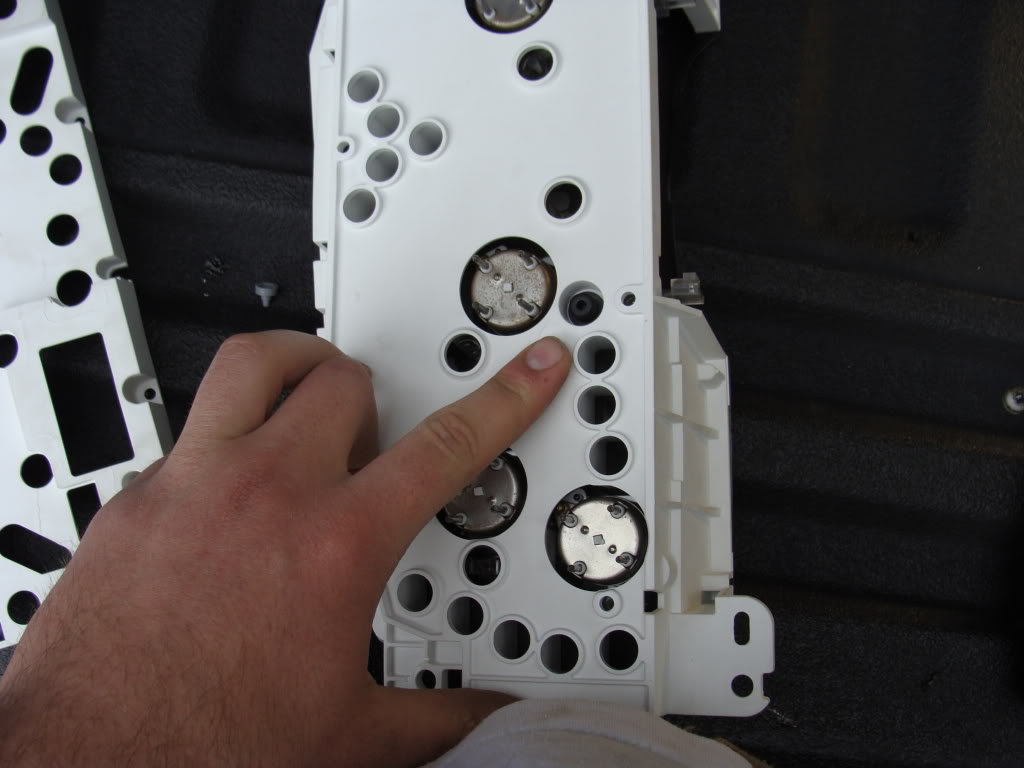
Once the back white support is off, carefully remove the odometer display connector from the back of the circuit board, it pulls straight off
Remove the main circuit board from the rest of the cluster
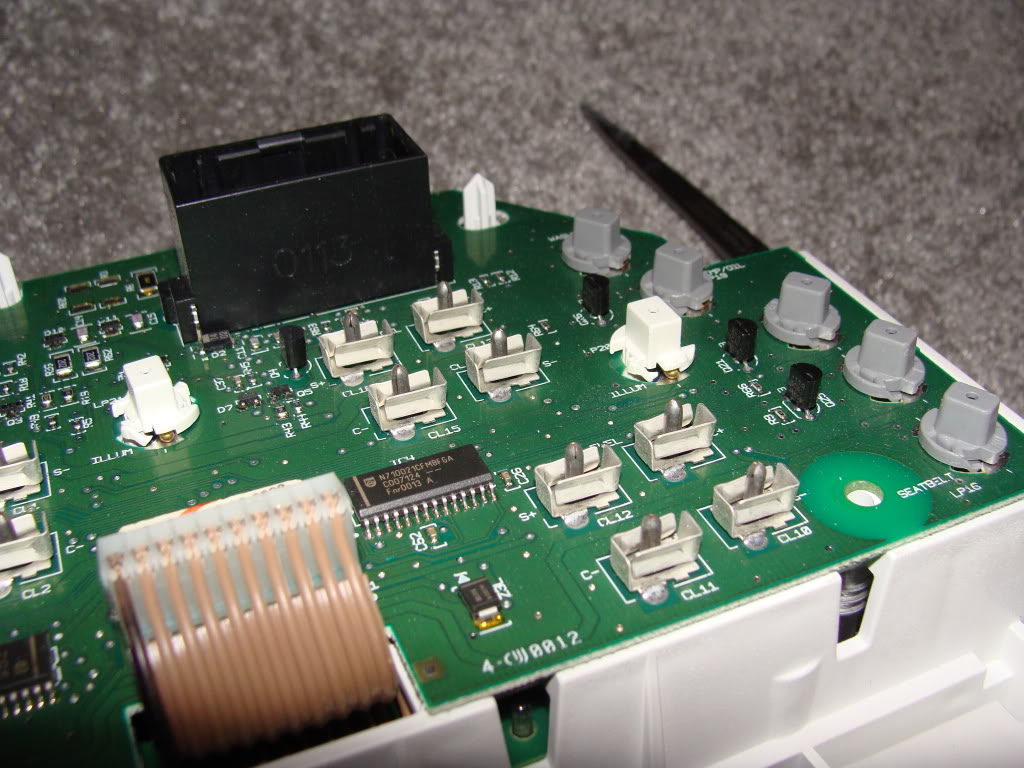
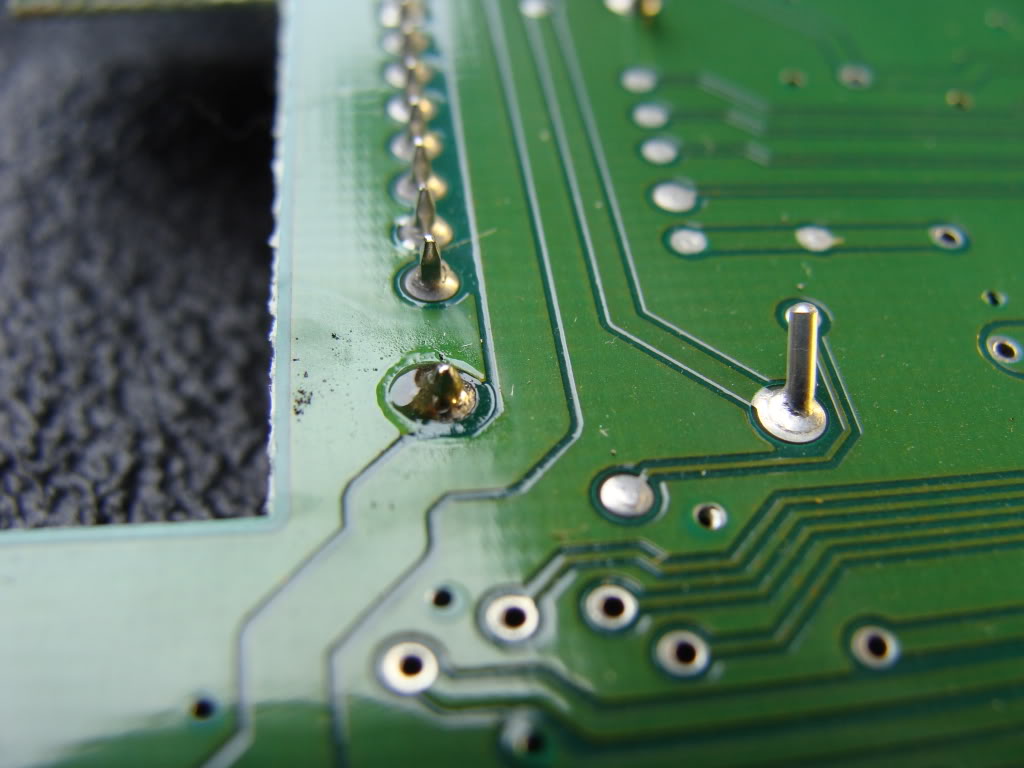
remember that display connector? Flip over the circuit board (gauge side up) and look at where the connector pins go through the board.
There is a row of 8 pins, then a space and then one pin by itself.
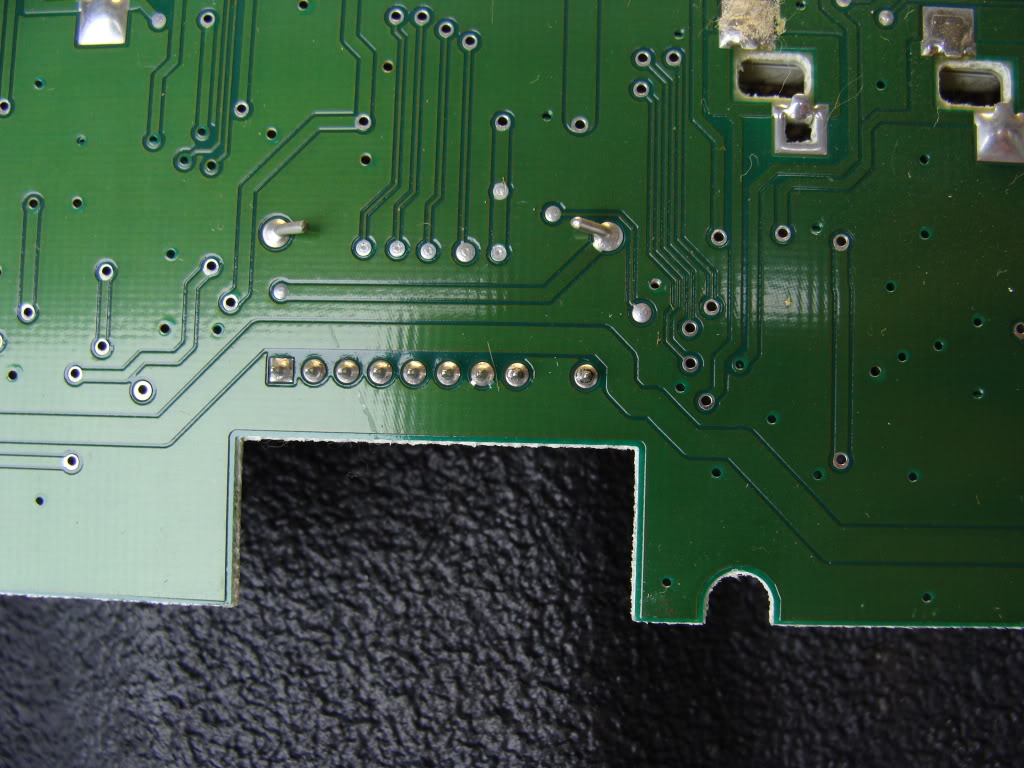
The pin that is by itself is the pin that will be repaired during this procedure.
It is very hard to see with the naked eye, but you can see the dark areas around this pin where the solder has failed
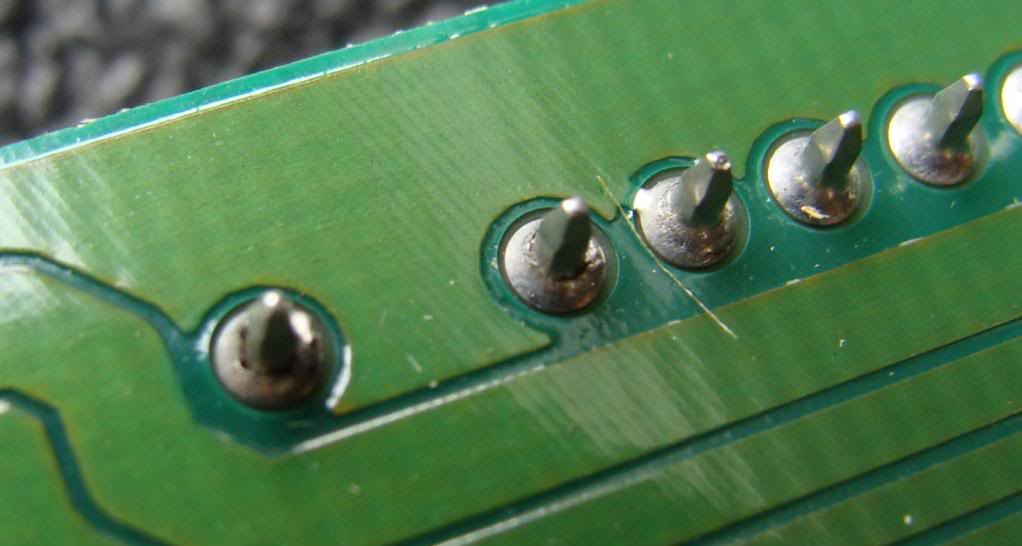
Carefully add solder that pin making sure not to over solder and cause a short in the circuit board.
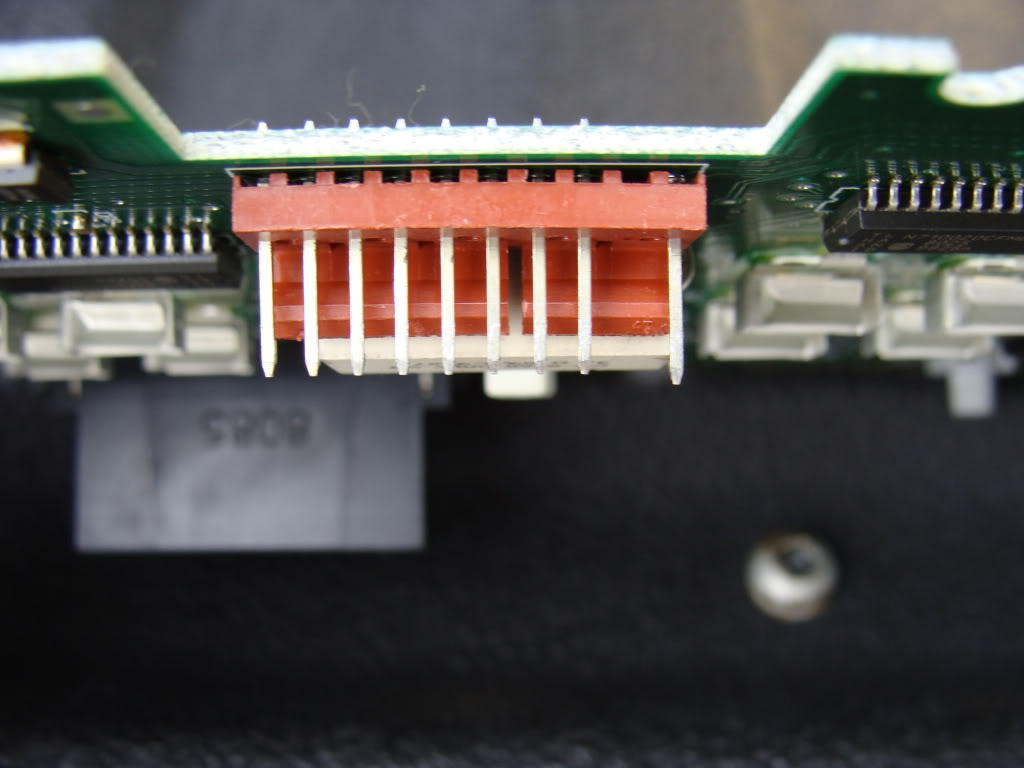
After soldering it should look like this:
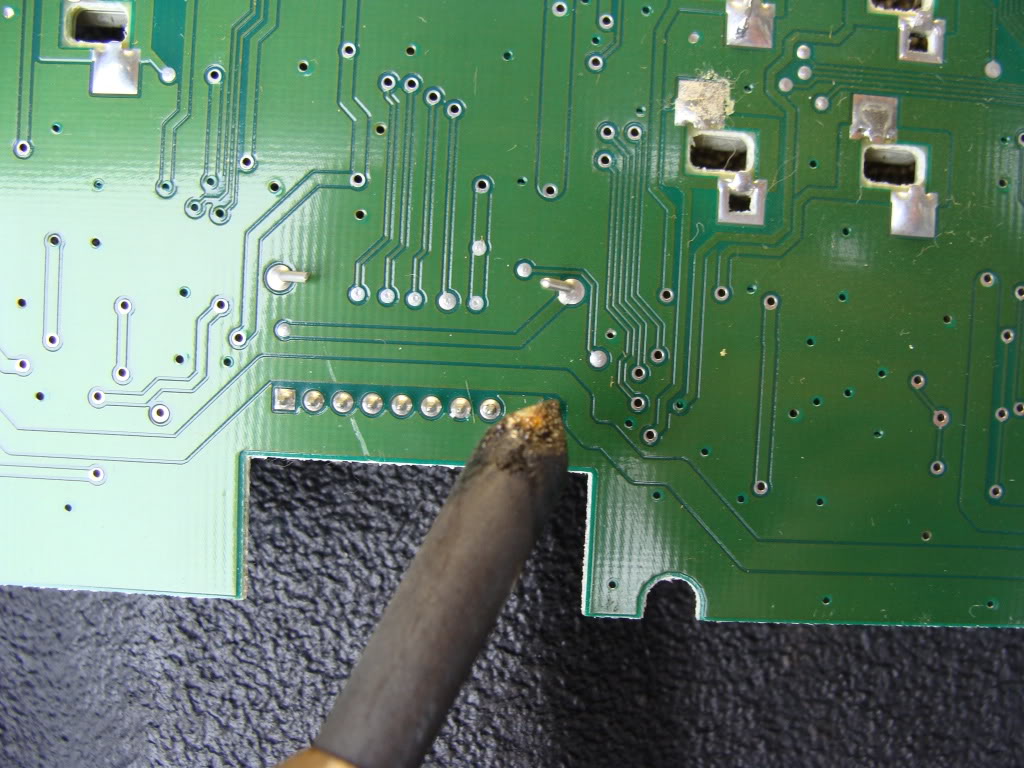
Be observant during the solder procedure. I was putting too much downward pressure on the pin as i heated it up, and i ended up pushing the pin through the board too far. This is easily reversible if you do this as well. Just reheat the solder and push the pin back into place, and align the length with the other pins.
Reassemble the back of the cluster and reinstall it into the vehicle. I would recommend plugging it in and testing it before you completely put the dash all back together.
I also would recommend taking the lens off of the cluster and clean the dust off of the inside of the face. Just remove the screws on the lens and clean it with a microfiber or non abrasive towel since it scratches very easily.
Good luck
How to remove dash pieces in Raptor's write up: https://www.f150online.com/forums/ar...r-97-03-a.html
Technically this write up has been done before but i have some larger pictures and more information (old link from 2003) https://www.f150online.com/forums/el...er-repair.html
Work was performed on a 1999 F150 but should be similar on all 1999-2003s
Anyways, start by removing the cluster
Be very careful not to break the little black clips that hold the gear indicator to the bottom of the cluster. Spread the clips out forward and backwords, and slide the indicator down.
Next dissasemble the back of the cluster, taking out the screws (I believe they are T10 possibly a T15)
Take note of the trip odometer selection button's location
Once the back white support is off, carefully remove the odometer display connector from the back of the circuit board, it pulls straight off
Remove the main circuit board from the rest of the cluster
remember that display connector? Flip over the circuit board (gauge side up) and look at where the connector pins go through the board.
There is a row of 8 pins, then a space and then one pin by itself.
The pin that is by itself is the pin that will be repaired during this procedure.
It is very hard to see with the naked eye, but you can see the dark areas around this pin where the solder has failed
Carefully add solder that pin making sure not to over solder and cause a short in the circuit board.
After soldering it should look like this:
Be observant during the solder procedure. I was putting too much downward pressure on the pin as i heated it up, and i ended up pushing the pin through the board too far. This is easily reversible if you do this as well. Just reheat the solder and push the pin back into place, and align the length with the other pins.
Reassemble the back of the cluster and reinstall it into the vehicle. I would recommend plugging it in and testing it before you completely put the dash all back together.
I also would recommend taking the lens off of the cluster and clean the dust off of the inside of the face. Just remove the screws on the lens and clean it with a microfiber or non abrasive towel since it scratches very easily.
Good luck


#4
06-14-2014, 01:08 AM

I followed your instructions and my odometer is working great now. My problem is that now my trip odometer selection won't work. Looking at the picture I can see the grey plastic/rubber piece that goes on the end of it but it is long gone. Does Ford sell this piece can I use something else instead? Thanks.
Last edited by Daffydavid; 06-14-2014 at 01:21 AM. Reason: updated
#5
10-18-2014, 04:45 PM

Junior Member
Join Date: Oct 2014
Location: Cadillac, Mi
Posts: 2
Likes: 0
Received 0 Likes
on
0 Posts
I replaced my complete cluster with a used one from my local salvage yard, tried to start my 2003 F150 before completely reassembling dash. Engine turns over normally but does not fire up. Did I do something wrong? there was a question on this forum about the coded key, could that be a problem?
#6
10-19-2014, 12:48 AM
#7
10-20-2014, 06:49 PM
Junior Member
Join Date: Oct 2014
Location: Cadillac, Mi
Posts: 2
Likes: 0
Received 0 Likes
on
0 Posts