How to Remove Your 2001 F-150 Grille and Paint it!!!
#1
 05-15-2007, 11:07 PM


Join Date: Mar 2006
Location: San Diego, California
Posts: 24
Likes: 0
Received 0 Likes
on
0 Posts
How to Remove Your 2001 F-150 Grille and Paint it!!!
Hey all,
Wrote this up for a guy on Meguiar's Online and he suggested to put it here...so here it is...
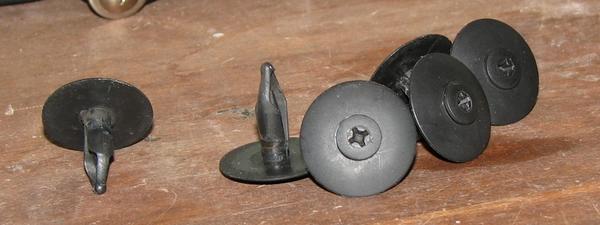
Step 1: Pop hood, remove 6 black plastic screws on black valance. There are 4 in the very front, 1 on both sides of the belt configuration sheet and 2 behind that, on top of the fan housing. I only removed the 4 in front and 2 on the sides of the belt configuration sheet; you can just lift the plastic up to remove the screws (Step 2). Tips for removing plastic screws: The best way I found is to put a screw driver underneath the plastic and push up, usually the screws come out better. You just have to play around with them, they each have they're own mind.

Put a screw driver underneath the plastic and push up, usually the screws come out better.

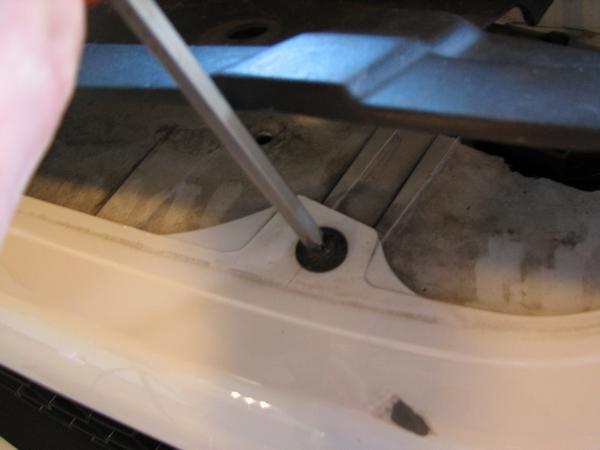
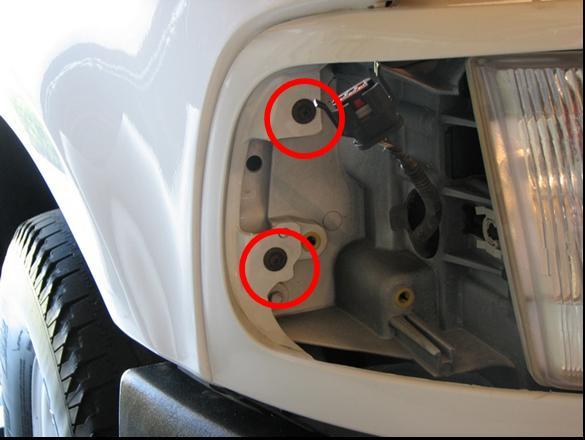
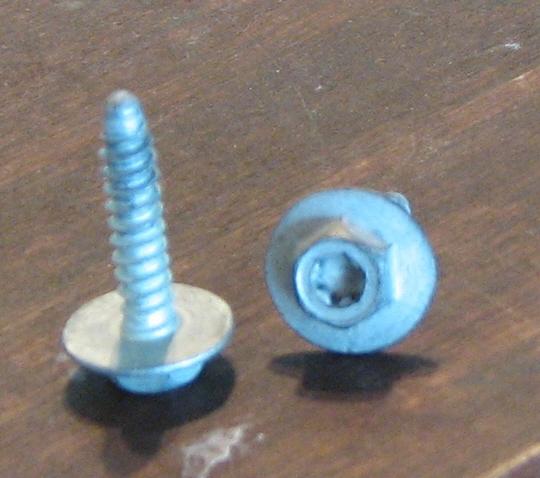
Step 2: Remove 6 metal screws/washers from the white grille housing, 2 above the headlights, the rest are under the valance, just lift it up and remove the screws.

Wrote this up for a guy on Meguiar's Online and he suggested to put it here...so here it is...
Step 1: Pop hood, remove 6 black plastic screws on black valance. There are 4 in the very front, 1 on both sides of the belt configuration sheet and 2 behind that, on top of the fan housing. I only removed the 4 in front and 2 on the sides of the belt configuration sheet; you can just lift the plastic up to remove the screws (Step 2). Tips for removing plastic screws: The best way I found is to put a screw driver underneath the plastic and push up, usually the screws come out better. You just have to play around with them, they each have they're own mind.
Put a screw driver underneath the plastic and push up, usually the screws come out better.
Step 2: Remove 6 metal screws/washers from the white grille housing, 2 above the headlights, the rest are under the valance, just lift it up and remove the screws.
#2
05-15-2007, 11:08 PM
Join Date: Mar 2006
Location: San Diego, California
Posts: 24
Likes: 0
Received 0 Likes
on
0 Posts
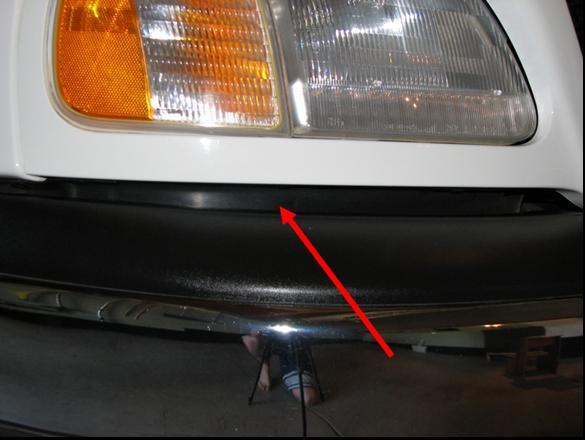
Step 3: Under both headlights, between the plastic grille housing and the top of the bumper, there is a plastic scoop. They are attached to the grille housing (plastic body colored piece; trim for the grille and lights). Put a screwdriver in-between the plastic scoop and the grille housing and pop the 4 body clips off, the scoop should then drop.
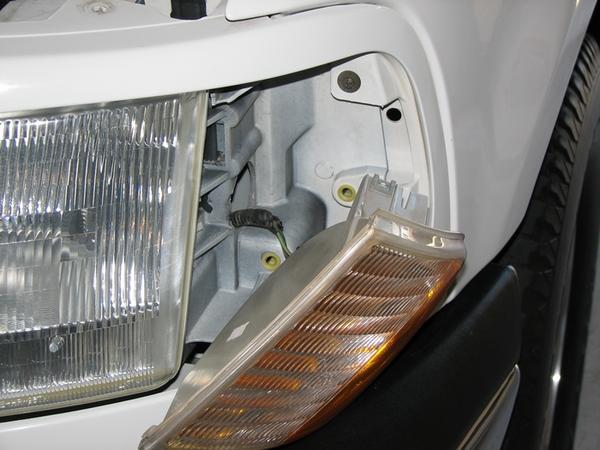
Step 4: Above the corner lights (turn signals), inside the engine bay, there is a star bolt holding them in. Remove the bolts (using T9 wrench)


Step 4: Above the corner lights (turn signals), inside the engine bay, there is a star bolt holding them in. Remove the bolts (using T9 wrench)
#3
05-15-2007, 11:09 PM
Join Date: Mar 2006
Location: San Diego, California
Posts: 24
Likes: 0
Received 0 Likes
on
0 Posts
Step 5: Wiggle the corner lights out, pull straight, not at an angle. The lights should come free. I removed the bulbs to allow an easier removal of the grille housing.
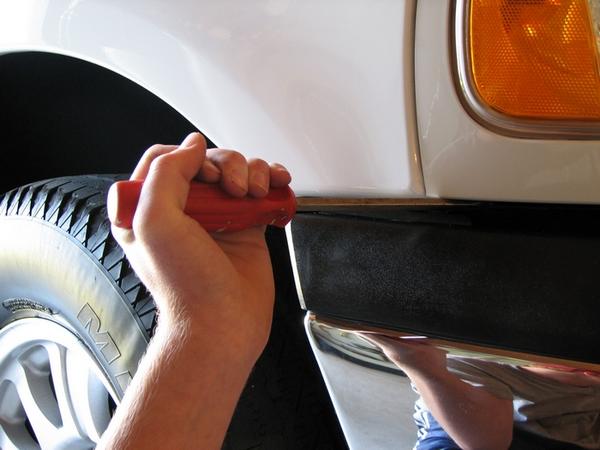
Step 6: Remove the two screws, top and bottom, inside the fog light housing. Grille should be pretty loose by now, almost done.
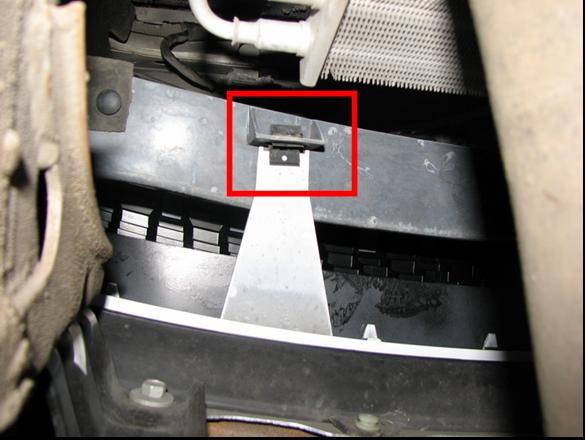
Step 7: Caution: Wear goggles, stuff will fall out from underneath the vehicle!! Go under the vehicle, in the middle you should see some insulation, just pull it down a little. You should see a plastic piece that is attached to the grille and goes towards the radiator.
Step 8: There are two plastic pieces, one on the left and one on the right, remove them both. The plastic pieces are held in with a clip. Compress the clip using a screwdriver. Caution: Once you remove the clips, the grille is completely unattached to the vehicle, make sure you're holding on to it or it will fall out and on to the ground!!
Step 6: Remove the two screws, top and bottom, inside the fog light housing. Grille should be pretty loose by now, almost done.
Step 7: Caution: Wear goggles, stuff will fall out from underneath the vehicle!! Go under the vehicle, in the middle you should see some insulation, just pull it down a little. You should see a plastic piece that is attached to the grille and goes towards the radiator.
Step 8: There are two plastic pieces, one on the left and one on the right, remove them both. The plastic pieces are held in with a clip. Compress the clip using a screwdriver. Caution: Once you remove the clips, the grille is completely unattached to the vehicle, make sure you're holding on to it or it will fall out and on to the ground!!
#4
05-15-2007, 11:10 PM
Join Date: Mar 2006
Location: San Diego, California
Posts: 24
Likes: 0
Received 0 Likes
on
0 Posts
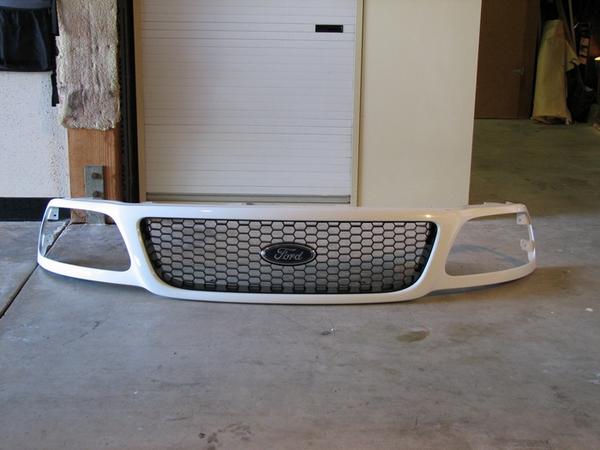
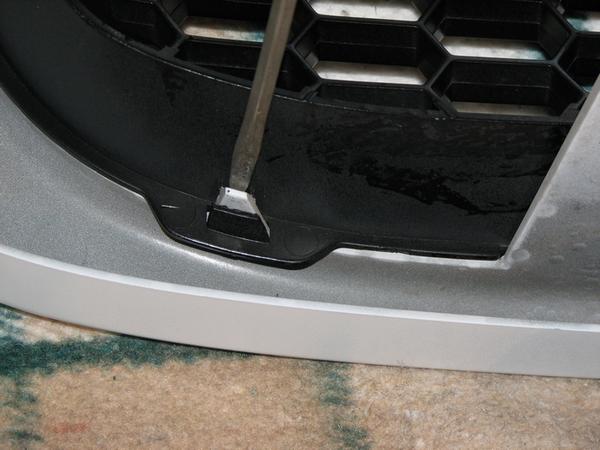
Step 9: Tricky part, be patient! You will see white tabs all around the grille; pull them back a little in order to release the grille from the housing. Start at the sides, and you may be lucky and the grille will come out all at once.

Step 10: Remove Ford Logo with a 10mm deep socket. You're ready to paint now.
You should have a total of 10 black metal screws with washers, 2 white star bolts and 6 black plastic screws with washers.

Step 10: Remove Ford Logo with a 10mm deep socket. You're ready to paint now.
You should have a total of 10 black metal screws with washers, 2 white star bolts and 6 black plastic screws with washers.
#5
05-15-2007, 11:12 PM
Join Date: Mar 2006
Location: San Diego, California
Posts: 24
Likes: 0
Received 0 Likes
on
0 Posts
Hope this Helps!!!
Here are the painting instructions:
Step 1: Wash grille using dishwashing soap to remove the grease and grime. Let it air dry or dry it off by hand, your choice.
Step 2: Go over grille with steel wool, I used 0000, Extra Fine, but you could probably use a little coarser if you want. This is to just remove the remaining grease and the get the plastic a little rough so the paint will stick.
Step 3: I sprayed Dupli-Color's Adhesion Promoter, which is for plastic and is supposed to help the paint stick better, it work great!! I sprayed about 3 coats, just to ensure that the paint would stick with no runs.
Step 4: After that dries (10min. max.), go ahead and start spraying the trim paint. Make sure you keep shaking every 30 seconds or so to ensure an even coat and so the paint won't run. I applied two coats front and back, and sprayed as needed to get into the "honey comb."
Let it dry for about 10 minutes and you can go ahead and re-install everything.
This is what I used:

Hope this Helps!!
#6
08-21-2008, 11:32 AM

#7
08-24-2008, 05:13 PM
Trending Topics
#8
08-24-2008, 05:23 PM
yea they are good instructions! i meant to do one, but didnt have the time to take pics, because i was trying to beat the rain whe i painted mine. Just remind people to resecure the tabs on the bottom of the grill to the rubber thing on top of the bumper...i didnt :embarrased:
and what Alex(raptor) said also!
and what Alex(raptor) said also!
#9
08-24-2008, 05:23 PM


#10
08-24-2008, 06:22 PM

Senior Member
Join Date: Jul 2007
Location: Fort Benning
Posts: 218
Likes: 0
Received 0 Likes
on
0 Posts


 Thanks for your contribution to the site!
#12
07-30-2010, 07:50 AM

Member
Join Date: Mar 2010
Location: Southern Ontario
Posts: 44
Likes: 0
Received 0 Likes
on
0 Posts
#13
08-15-2010, 05:30 PM

Member
Join Date: Aug 2010
Location: Arizona
Posts: 63
Likes: 0
Received 0 Likes
on
0 Posts
#14
08-29-2010, 09:06 PM

Senior Member
#15
12-10-2010, 05:43 PM

Senior Member
Join Date: Feb 2007
Location: Austin, Texas
Posts: 599
Likes: 0
Received 0 Likes
on
0 Posts