How-To: Fix a Damaged Fuel Line
#1
 07-05-2010, 11:53 AM


How-To: Fix a Damaged Fuel Line
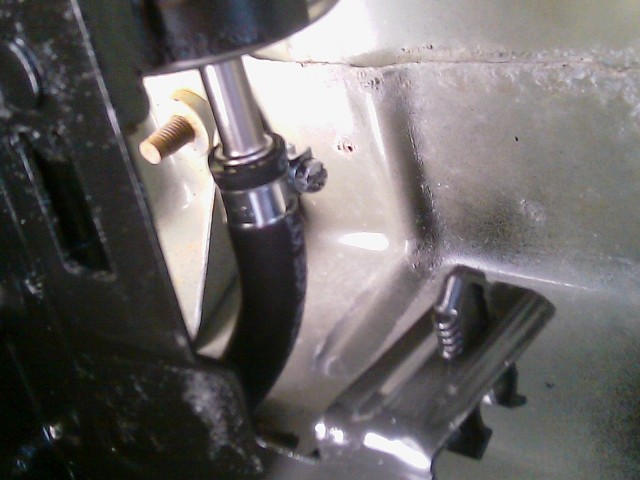
Well, I initially started out to only clean the underbody of the truck so I could paint it and make it look nice again. But instead I figured since I had the truck lifted, I might as well change the fuel filter. I've changed the fuel filter on this thing 3 times already with not too much hassle. However, the last time I changed it, I happened to notice that the quick disconnect wasn't quite working correctly. However, I got the filter changed. This time around, I was in for a big surprise. The pins that hold the filter cartidge in somehow bent themselves. I cut the filter off, and then examined the situation. I then got the bright idea to call my local Ford dealer and have them quote me for a new fuel line. They wanted over $100 for just the fuel line. So I laughed, and said no way Jose. 
Also, changing filters from now on will be a breeze. I'm liking that it broke.
Total Cost: $10.62.
Total Labor: 1 hour (beginner). 10 minutes (pro).
Difficulty rating: Requires some basic automotive knowledge.
So how did I fix it? No biggie...
Here's the tools you need to get the job done right:
- New Motorcraft FG-1083 Fuel Filter
- 3-22mm Midget Pipe cutter
- 3/8" ID Fuel-Injected Fuel Hose - 2 feet
- 3 Fuel-Injected Hose clamps that fits 3/8" ID - 5/16" ID hoses.
- Flat Head Screw Driver
- 13mm ratchet with extension
- PB Blaster/WD40 Lubricant
- Bucket/Pail
- Safety Goggles/Nitrile Gloves and some shop rags.
Make sure the truck is cooled off, and you have some sort of eye protection and hand protection!!!
Step 1: Disconnect the fuel filter on the blue clip end. Some fuel will might spray out (use caution!). Ensure most of the fuel is drained out of the lines.
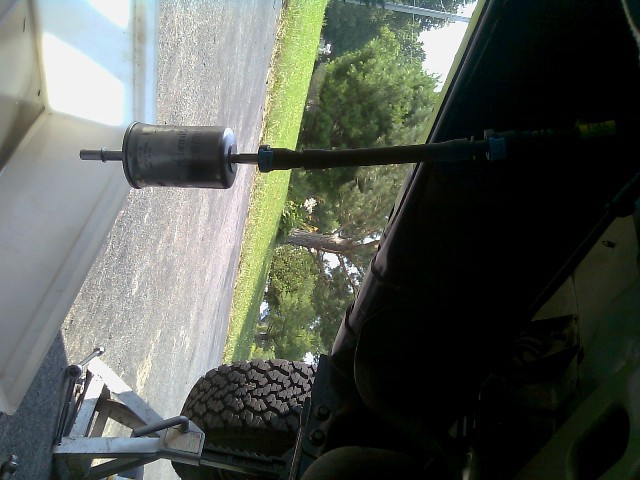 (Yeah, I cheated and just took it off the unsafe way!)
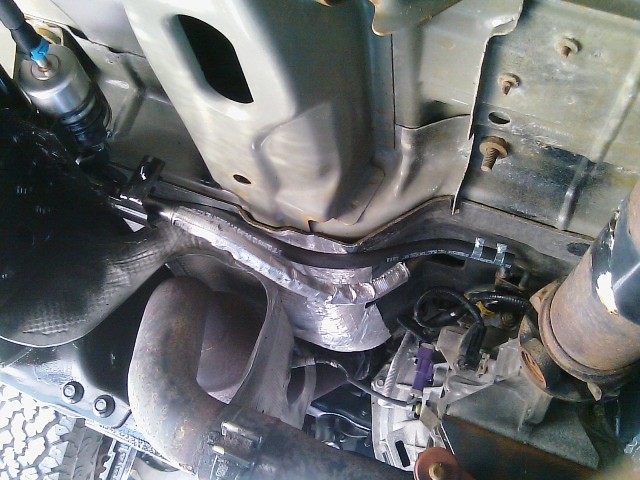
Step 2: Get your 13mm ratchet with extension, and remove the bolt that holds the fuel rail bracket onto the transmission. Use some PB Blaster or WD40 to help break the bolt loose. Carefully take the mount off the transmission. This aides in giving more room to work on the fuel rail when cutting the line.
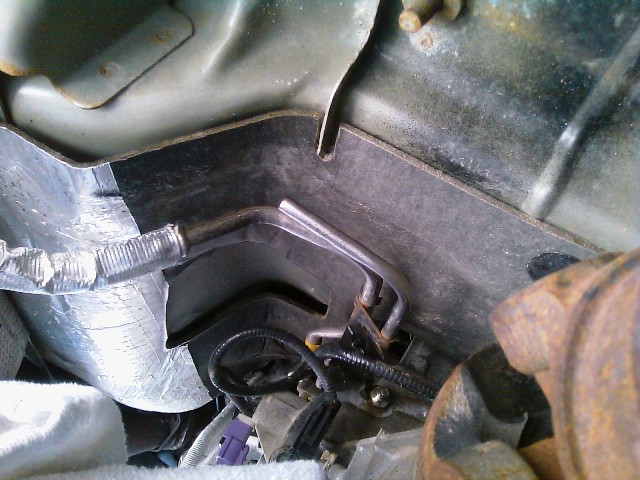
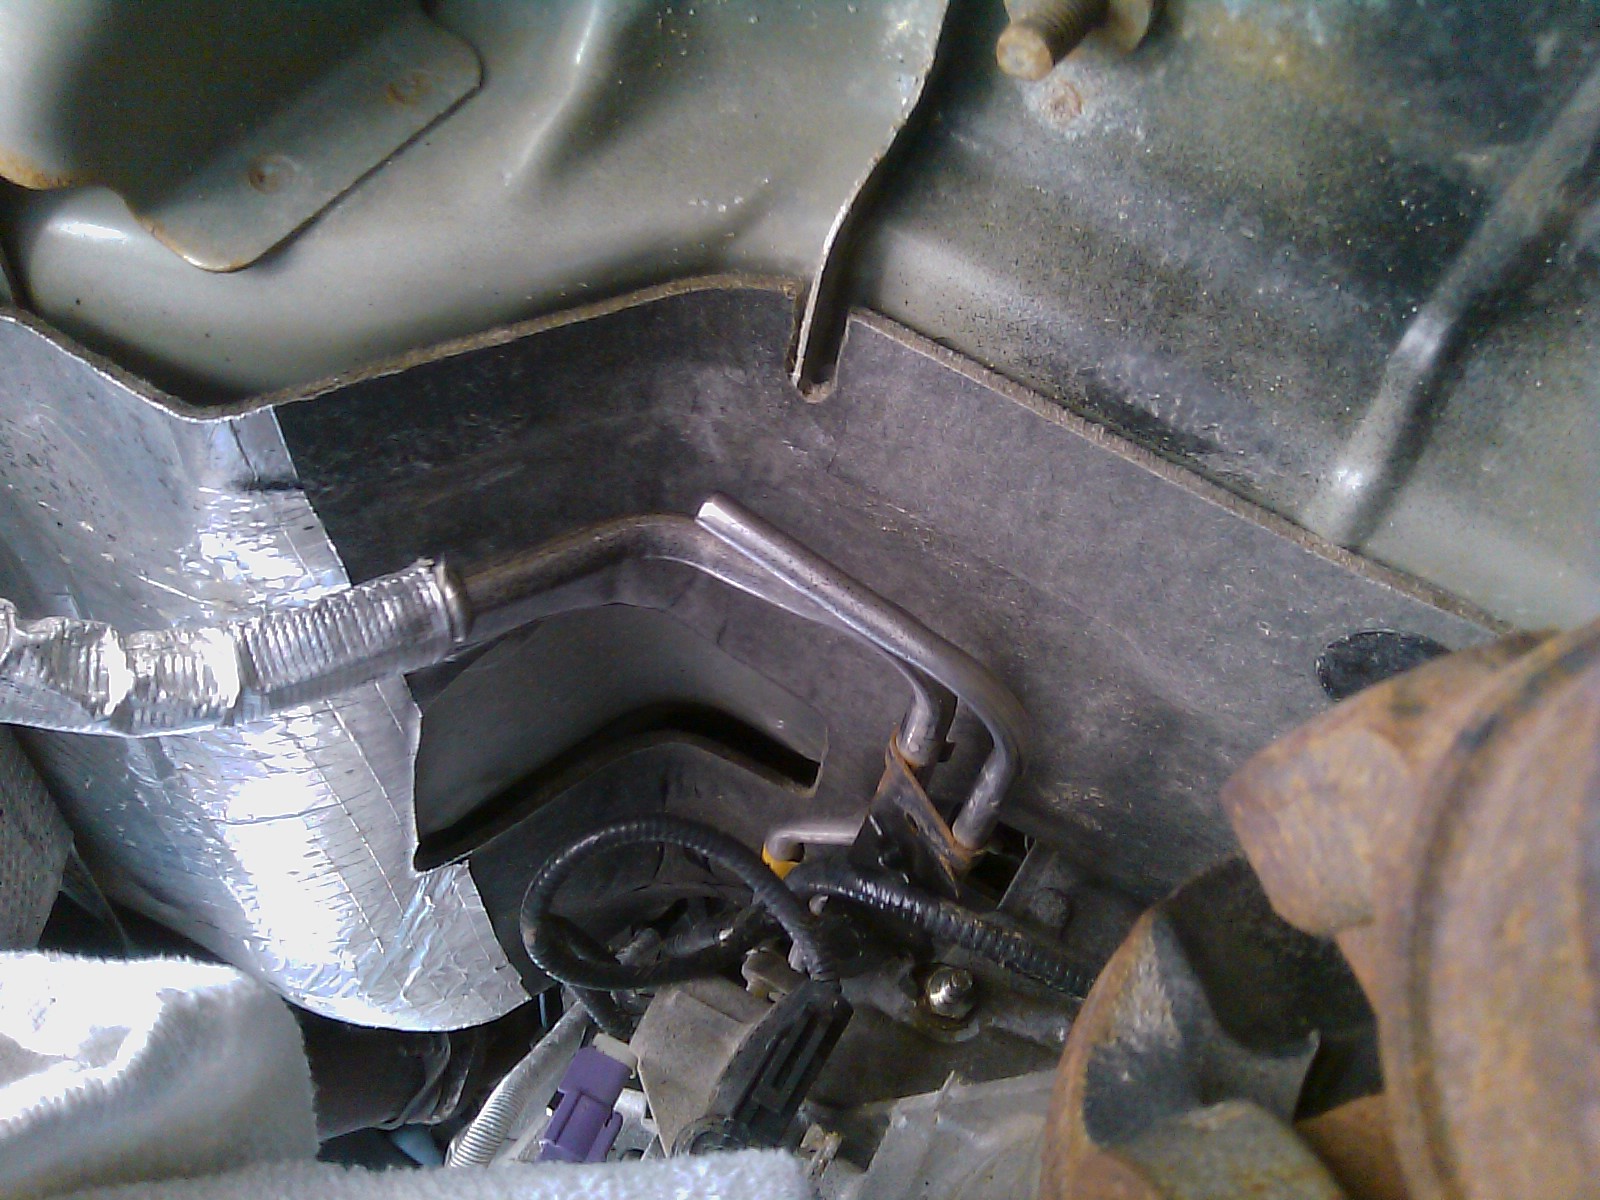
Step 3: Get your Midget pipe cutter and begin cutting right after the bend, to match what I've got in the picture below:
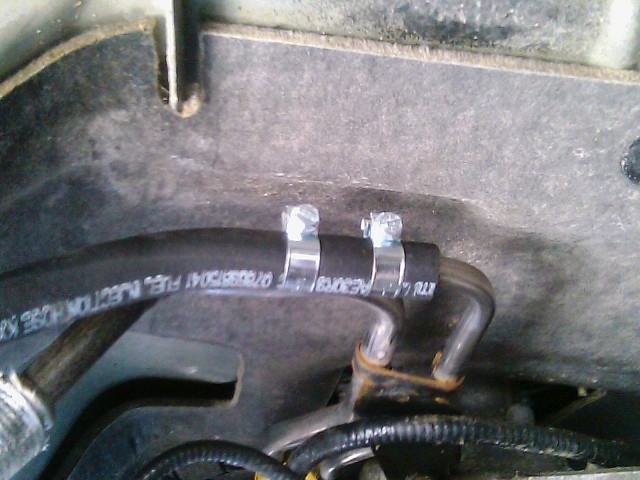
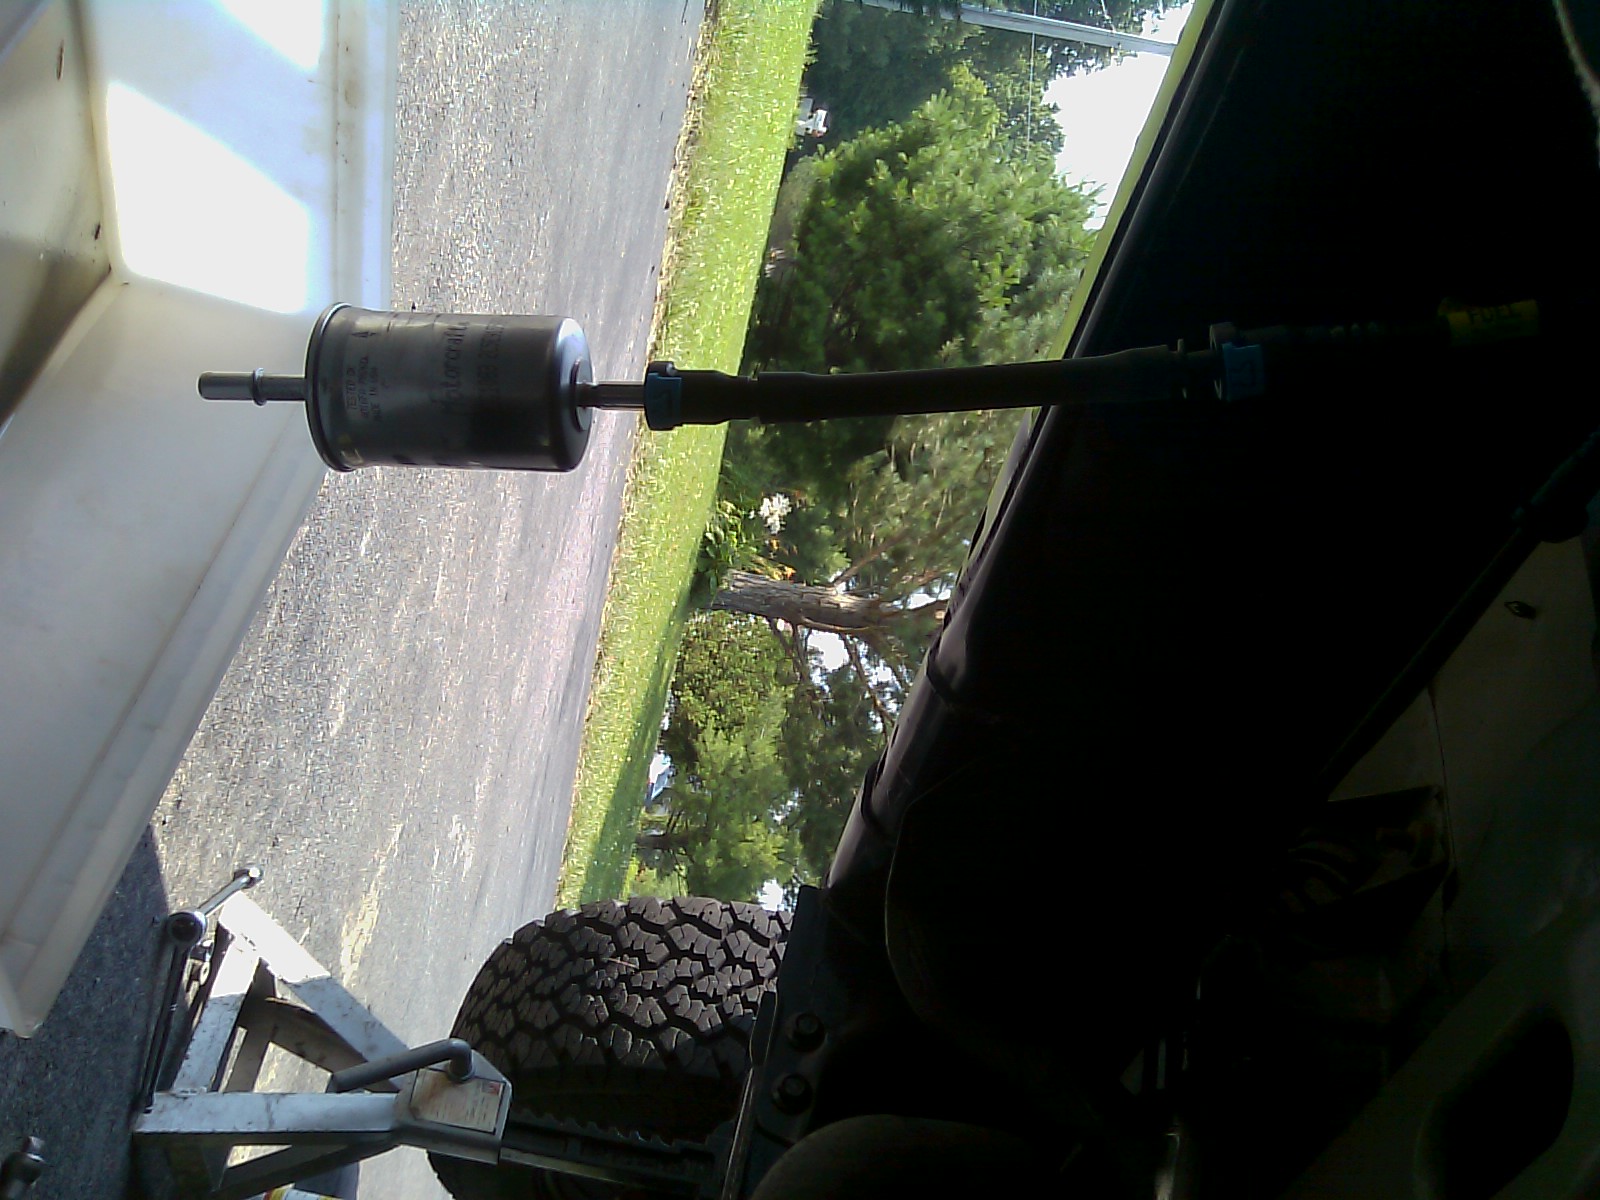
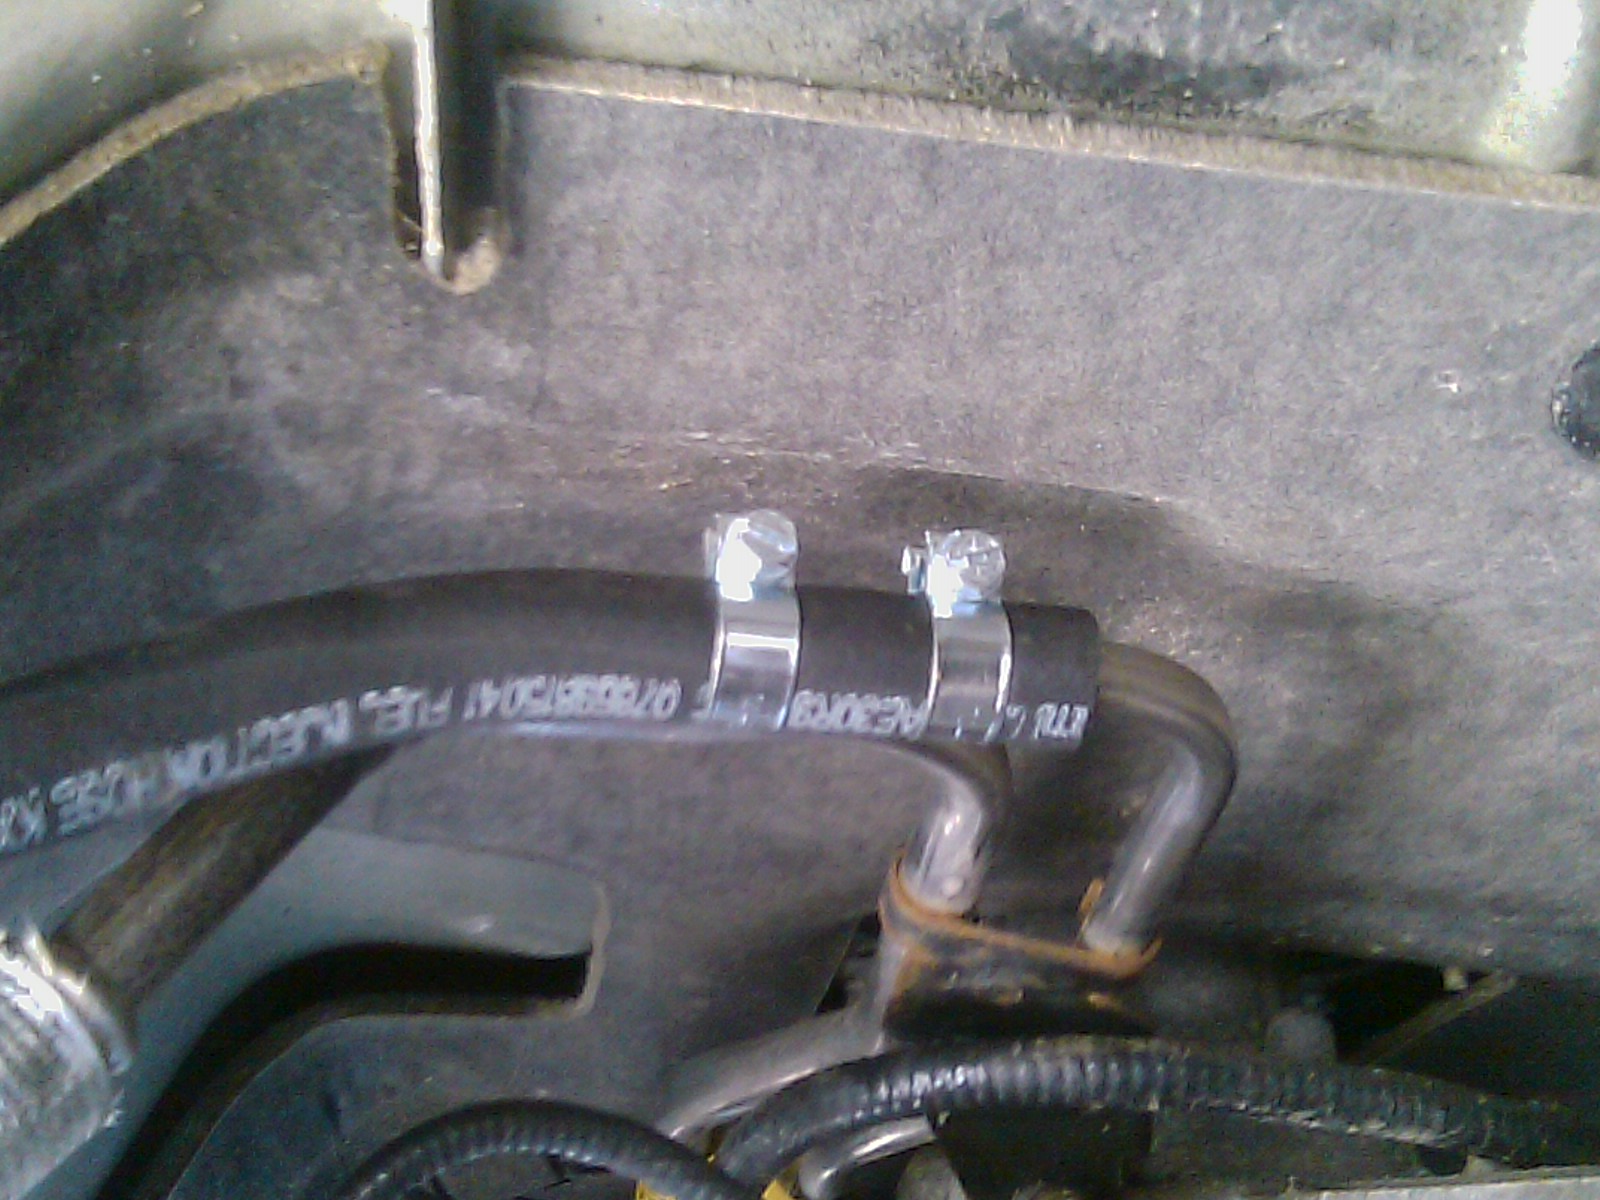
Step 4: Prepare your 3/8", 2' Fuel-Injected Fuel Rated hose with the 3 Fuel-Injected Hose clamps that fits 3/8" ID - 5/16" ID hoses.
Step 5: Slip the hose on to the fuel rail and use your screw driver to tighten the the clamps down. They should be tightened a little past hand tighten. Don't over do it, or it might crush the line or bust the hose clamp.
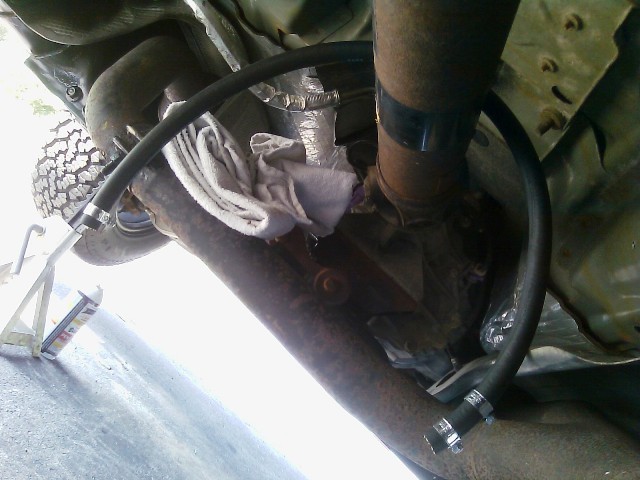
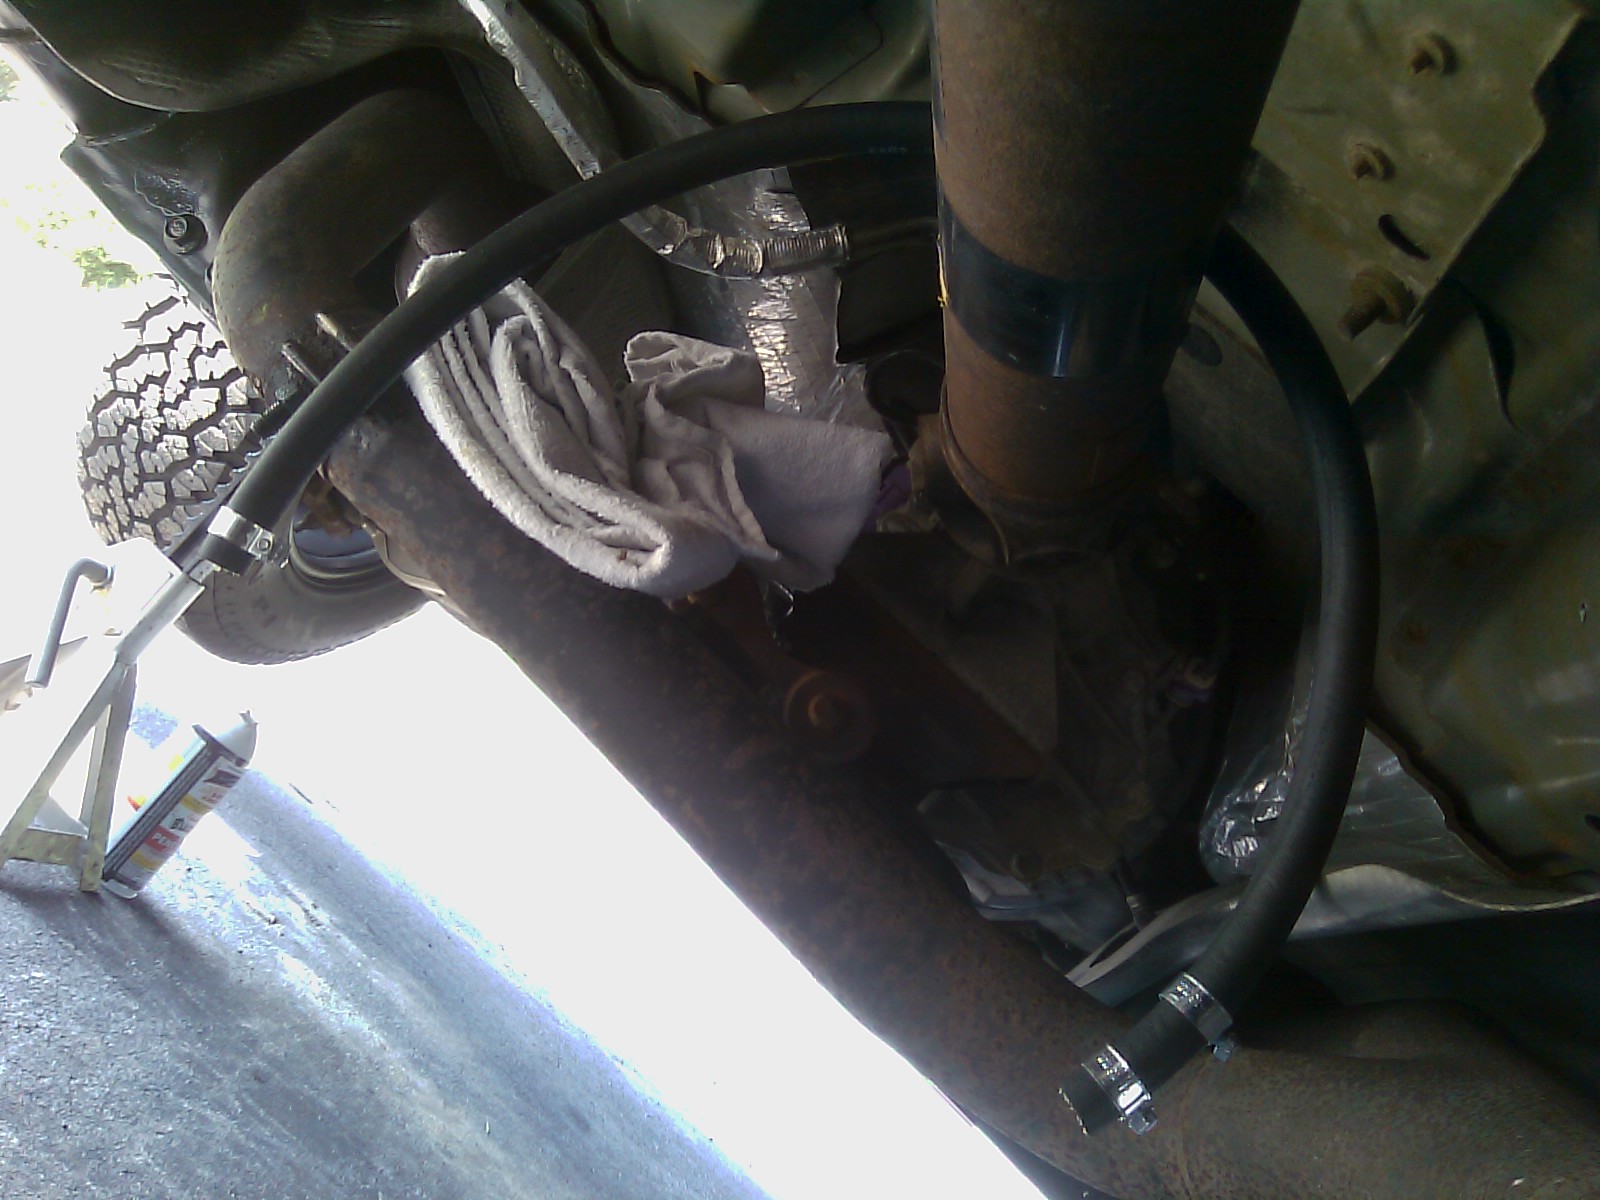
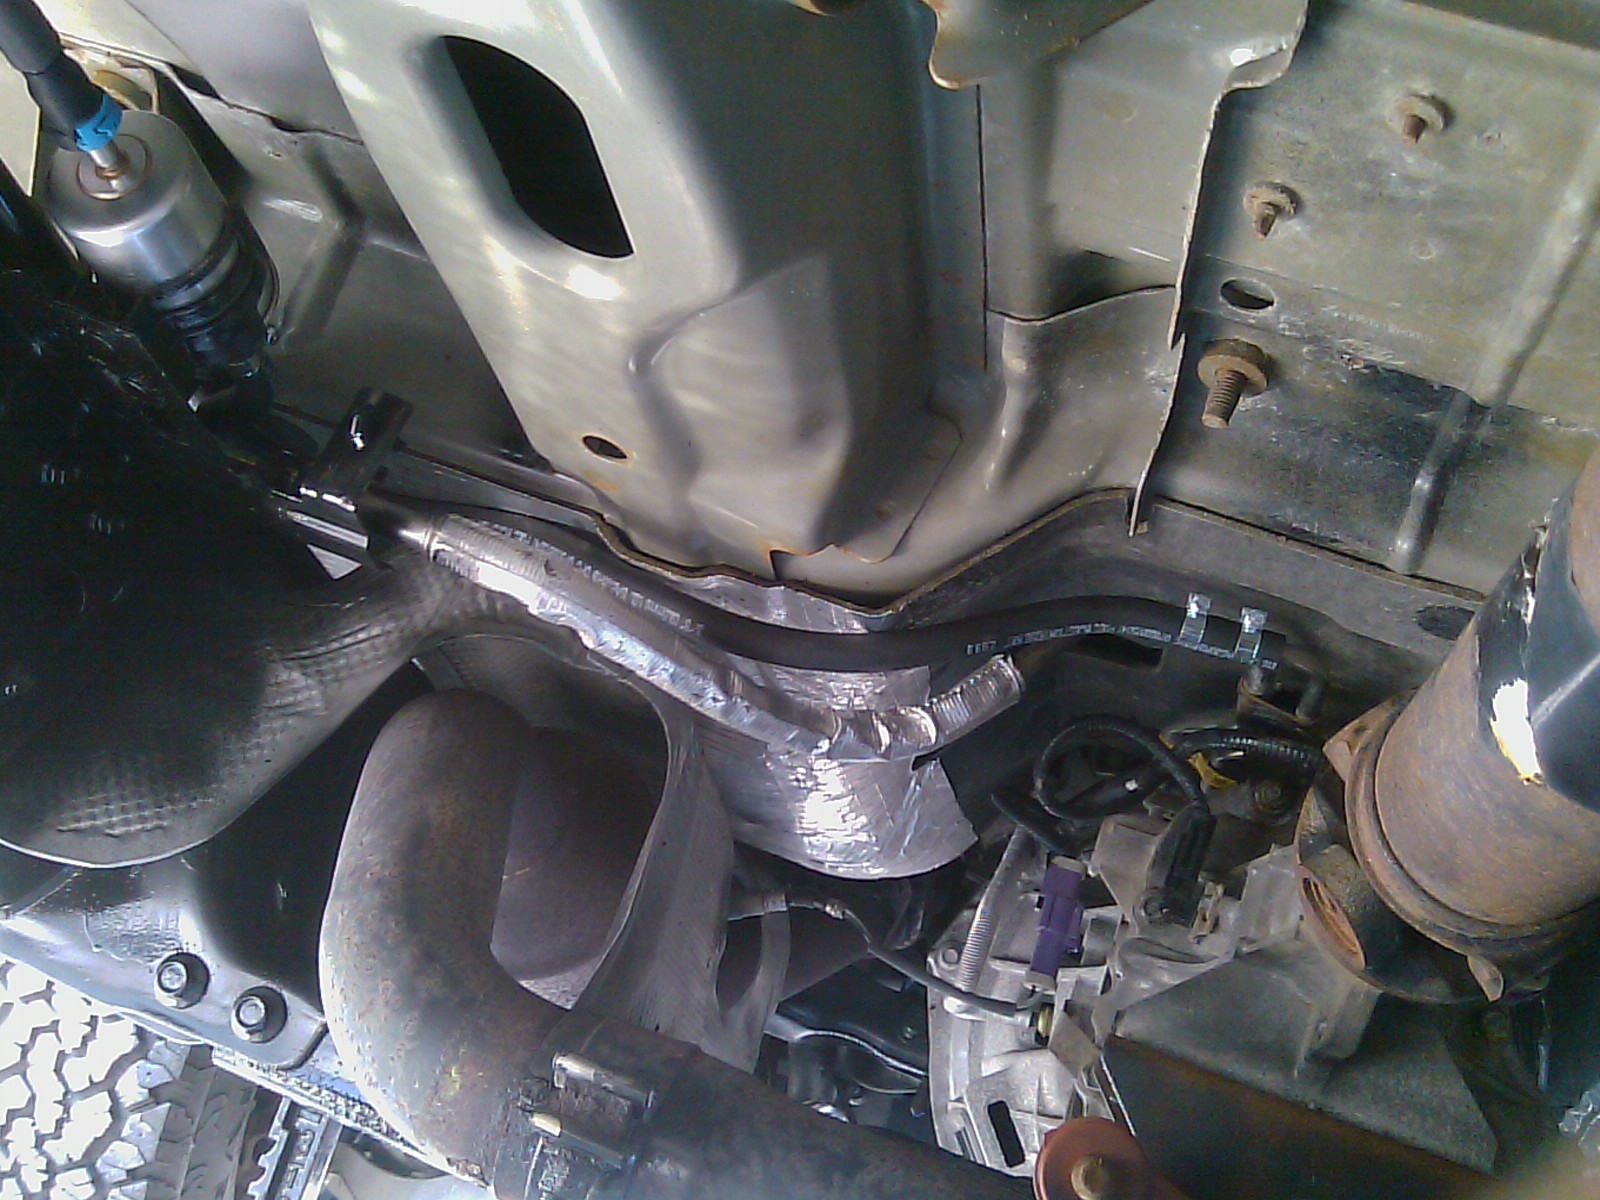
Step 6: Route the hose away from the catalytic converter and exhaust pipes.
Step 7: Slip other end of hose onto the fuel filter and tighten the hose clamp.
Step 8: Check for any leaks by cycling ignition from "Off" to "Run" position several times and carefully inspecting the hose connections. Stop if you notice anything wrong!!
Step 9: Return the fuel rail bracket to it's respective location and reapply the nut and tighten it using the 13mm ratchet with the extension.
Step 10: If all is well, the job is done and it should look something similar to this:
Also, changing filters from now on will be a breeze. I'm liking that it broke.
Total Cost: $10.62.
Total Labor: 1 hour (beginner). 10 minutes (pro).
Difficulty rating: Requires some basic automotive knowledge.
So how did I fix it? No biggie...
Here's the tools you need to get the job done right:
- New Motorcraft FG-1083 Fuel Filter
- 3-22mm Midget Pipe cutter
- 3/8" ID Fuel-Injected Fuel Hose - 2 feet
- 3 Fuel-Injected Hose clamps that fits 3/8" ID - 5/16" ID hoses.
- Flat Head Screw Driver
- 13mm ratchet with extension
- PB Blaster/WD40 Lubricant
- Bucket/Pail
- Safety Goggles/Nitrile Gloves and some shop rags.
Make sure the truck is cooled off, and you have some sort of eye protection and hand protection!!!
Step 1: Disconnect the fuel filter on the blue clip end. Some fuel will might spray out (use caution!). Ensure most of the fuel is drained out of the lines.
 (Yeah, I cheated and just took it off the unsafe way!)
Step 2: Get your 13mm ratchet with extension, and remove the bolt that holds the fuel rail bracket onto the transmission. Use some PB Blaster or WD40 to help break the bolt loose. Carefully take the mount off the transmission. This aides in giving more room to work on the fuel rail when cutting the line.
Step 3: Get your Midget pipe cutter and begin cutting right after the bend, to match what I've got in the picture below:
Step 4: Prepare your 3/8", 2' Fuel-Injected Fuel Rated hose with the 3 Fuel-Injected Hose clamps that fits 3/8" ID - 5/16" ID hoses.
Step 5: Slip the hose on to the fuel rail and use your screw driver to tighten the the clamps down. They should be tightened a little past hand tighten. Don't over do it, or it might crush the line or bust the hose clamp.
Step 6: Route the hose away from the catalytic converter and exhaust pipes.
Step 7: Slip other end of hose onto the fuel filter and tighten the hose clamp.

Step 8: Check for any leaks by cycling ignition from "Off" to "Run" position several times and carefully inspecting the hose connections. Stop if you notice anything wrong!!
Step 9: Return the fuel rail bracket to it's respective location and reapply the nut and tighten it using the 13mm ratchet with the extension.
Step 10: If all is well, the job is done and it should look something similar to this:

#3
07-05-2010, 10:43 PM

on your fuel filter side i would recommend pushing the hose over the locking spine on the filer output, and put a clamp upstream of the spine for added seal and for cheap insurance
also flaring the end of the fuel line on side that goes along the transmission might not be a bad idea either
also flaring the end of the fuel line on side that goes along the transmission might not be a bad idea either
#4
07-05-2010, 11:33 PM
on your fuel filter side i would recommend pushing the hose over the locking spine on the filer output, and put a clamp upstream of the spine for added seal and for cheap insurance
also flaring the end of the fuel line on side that goes along the transmission might not be a bad idea either
also flaring the end of the fuel line on side that goes along the transmission might not be a bad idea either
I didn't think it would need flaring... being that it is under only a small amount of pressure, not like brake lines. Not to mention it's well protected being up that high, plus two clamps.
I did test and I was amazed how much I had to loosen those clamps before any fuel started leaking. I doubt I'll have any problems, plus I change it every 10k or so... I doubt they'd give me any problems.
But thanks for the suggestions.
#5
07-05-2010, 11:39 PM
i believe your truck still uses a return line, in which case your pump probably puts out 65-70 PSI, not exactly small amount of pressure if you ask me.
I know what you mean tho, try spraying a touch of lubricant on the filter before you push the rubber over it.
I'd probably check every 3,000 miles to make sure they stay tight, ive seen hose clamps like that loosen up over time
Also only saw one clamp pictured on your filter side, would recommend using two if you can
#6
07-06-2010, 08:02 AM
i believe your truck still uses a return line, in which case your pump probably puts out 65-70 PSI, not exactly small amount of pressure if you ask me.
I know what you mean tho, try spraying a touch of lubricant on the filter before you push the rubber over it.
I'd probably check every 3,000 miles to make sure they stay tight, ive seen hose clamps like that loosen up over time
Also only saw one clamp pictured on your filter side, would recommend using two if you can
I know what you mean tho, try spraying a touch of lubricant on the filter before you push the rubber over it.
I'd probably check every 3,000 miles to make sure they stay tight, ive seen hose clamps like that loosen up over time
Also only saw one clamp pictured on your filter side, would recommend using two if you can
This week I'll mess with it and see if I can get it over the other part so I can use two clips instead of one. Would be nice if it'd work.
#7
07-06-2010, 12:43 PM

Senior Member
Originally Posted by ManualF150 in part:
I tried getting it over that locking spline on the filter output with no luck. I'm sure if I toyed with the filter and ground it down slightly, it would probably work. I'll try next time I need to change the filter.
Originally Posted by ManualF150 again in part:
This week I'll mess with it and see if I can get it over the other part so I can use two clips instead of one. Would be nice if it'd work.
Measure where your clamp is from the body now, then use some vasoline on the tip of the hose and push it over that ring. Don't grind that ring, it's not solid but just made like a flare so touching it with a grinder will result in a leak pretty quick.
Maybe a better alternativeto prevent the hose slipping off without possibly damaging it by pushing over that ring is:
- Take a piece of hose same length as from fuel filter to ring, split it one side, place on filter.
- Then make two metal straps of thin metal, old stainless clamps will supply material suitable for two.
- Cut eack a bit longer than the length of the pipe on that end of the filter.
- Put these two pieces opposite each other against the good fuel hose behind the ring and the piece you split and put in place ahead of the ring.
- Install two clamps, one on the part where the good hose is, one on the other side of the ring.
- Tighten.
- Bend excess up over clamps thus locking the fuel hose in place on the short tube past the ring.
On the other end, I found my double flare kit makes great bulges on the end of metal lines. I just don't go the second step after starting the flare with adapter. There's not much likely hood of crushing the steel fuel line at the far end where you have the current two clamps, you'll wreck a clamp or cut the hose first, or both.
Thanks ........

Last edited by tbear853; 07-06-2010 at 12:50 PM.
Trending Topics
#8
07-06-2010, 01:18 PM
How big should I make the flair on the pipe above the transmission? Should it be just a slight one, just to give it a little more tightness when the hose goes over it?
Although, I was reading where one guy went all out and used braided stainless steel lines and used flaired compression fittings.
But it's only a work truck... don't need to get all fancy now with braided SS lines.
Although, I was reading where one guy went all out and used braided stainless steel lines and used flaired compression fittings.
But it's only a work truck... don't need to get all fancy now with braided SS lines.
#9
07-06-2010, 05:52 PM
Senior Member
How big should I make the flair on the pipe above the transmission? Should it be just a slight one, just to give it a little more tightness when the hose goes over it?
Although, I was reading where one guy went all out and used braided stainless steel lines and used flaired compression fittings.
But it's only a work truck... don't need to get all fancy now with braided SS lines.
Although, I was reading where one guy went all out and used braided stainless steel lines and used flaired compression fittings.
But it's only a work truck... don't need to get all fancy now with braided SS lines.
I was just offering suggestions that might help in it lasting longer .... maybe.
The stainless braided stuff is good too, and some will do that .... especially on a truck they intend to keep for a number of years (I also still have and use my '77 F-150 purchased in '87 or '86 .... I forget which now .... can't say whether I've replaced rubber fuel line 4 or 5 times but I have replaced every brake hardline at least twice and the rubber flex lines thrice as of last summer, and used 3/8" steel and replaced fuel line from tank at back all way to fuel pump. Only has 102K on it.)
Just inspect the line when replacing the fuel filter or changing oil, etc as you would other soft lines.
When I built my house I used 4 16D at each end of each stud (2 straight in through plate or sole, two toenailed opposite sides) where as a buddy used 2 at most, I often say "never use a nail where a lag biolt will fit" ....

Last edited by tbear853; 02-21-2015 at 08:38 PM.
#10
07-07-2010, 09:38 PM
Update:
I took the line and made a tiny little cut on the end of the hose to facilitate itself onto over the flange on the fuel filter. Now it's double clamped.
Right now I can't seem to find my flairing tool... it's around the shop someplace. By the next oil change I'll find it.
Here's what I did:
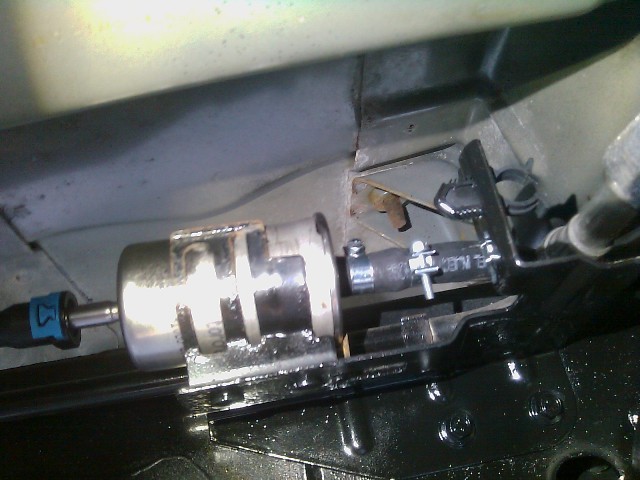
I took the line and made a tiny little cut on the end of the hose to facilitate itself onto over the flange on the fuel filter. Now it's double clamped.
Right now I can't seem to find my flairing tool... it's around the shop someplace. By the next oil change I'll find it.
Here's what I did:

#11
04-18-2011, 10:22 PM
Senior Member
Not just a flaring tool .... but a "double flaring tool" like you'ld use on brake lines.
The first step with a regular flare kit just flares a tube and that's all. It's like pushing a hose over a funnel from the wrong end, hard on hose and leaves a sharp edge on the pressure side.
With a "double flaring tool", the first step uses the clamp and press like the regular kit, but you also use a special die inbetween the press and end of the tool. This first step creats a bubble like bulge that you can carefully inspect every 1/4 turn to get just the right bulge, but it leaves NO sharp edges. Then, just don't do the second step that you would to make a double flare.
Look at a hose barb on some fuel filters and stuff, looks like a rounded bulge that you slip the hose over and clamp behind. You can make the same bulg with a double flare tool just doing the first step part way.
#12
04-18-2011, 10:32 PM

Senior Member
Join Date: Jan 2010
Location: Brecksville, Ohio
Posts: 1,228
Likes: 0
Received 0 Likes
on
0 Posts
#13
09-24-2011, 07:35 PM
Update:
I went to replace the fuel filter. I needed to chop off the old section of hose that.was connected to the filter. You will eventually run out of hose, and you will need to buy a new small piece. It all depends on how much you left and the amount of times you change the filter.
The reason is because it will not seal as well.
#14
01-16-2015, 07:08 PM


