Bed Rail Cap Trim repainting How-To
#1
 11-14-2009, 01:48 PM


Bed Rail Cap Trim repainting How-To
Here is my write up for re-painting faded bed rail caps. This will work for any '97+ truck.
Sick of gray faded trim and tired of applying dressings and dyes that only need to be re-applied after & after? Then paint them! Products used, and necessities..
400, and 1000 Grit Sand Paper
2 Roles of Painters Tape
A S$%@ Load of Newspaper
2 cans of Dupli Color Plastic Adhesion Promoter
1 can of Krylon Grey Primer
2 cans of Krylon Fushion Satin Black
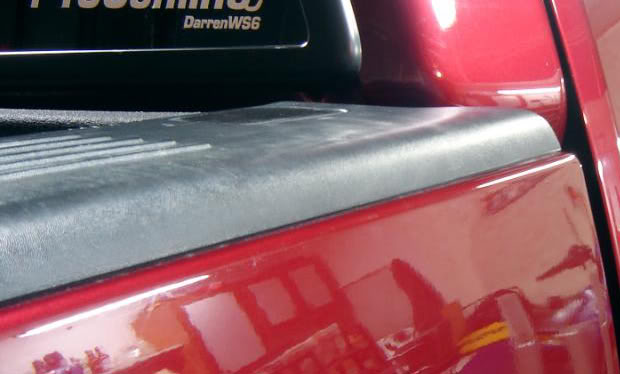
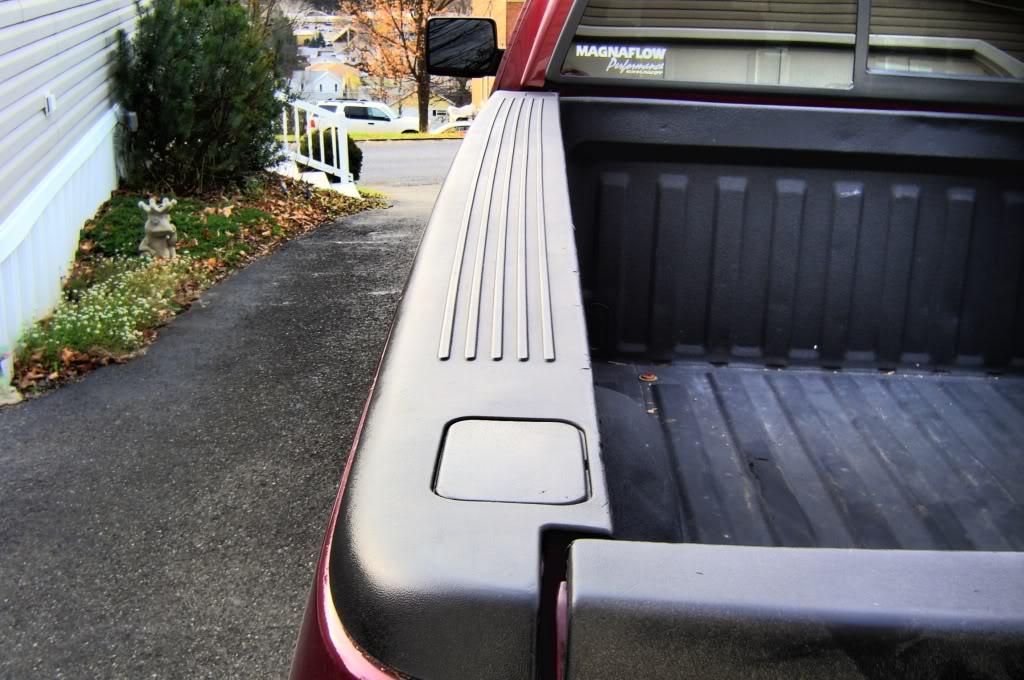
I did not take any before shots, but my caps were pretty faded and white spotted. This is about the closest shot I have displaying a rail cap zoomed in from a different purpose photo.
First Step, Preparation.
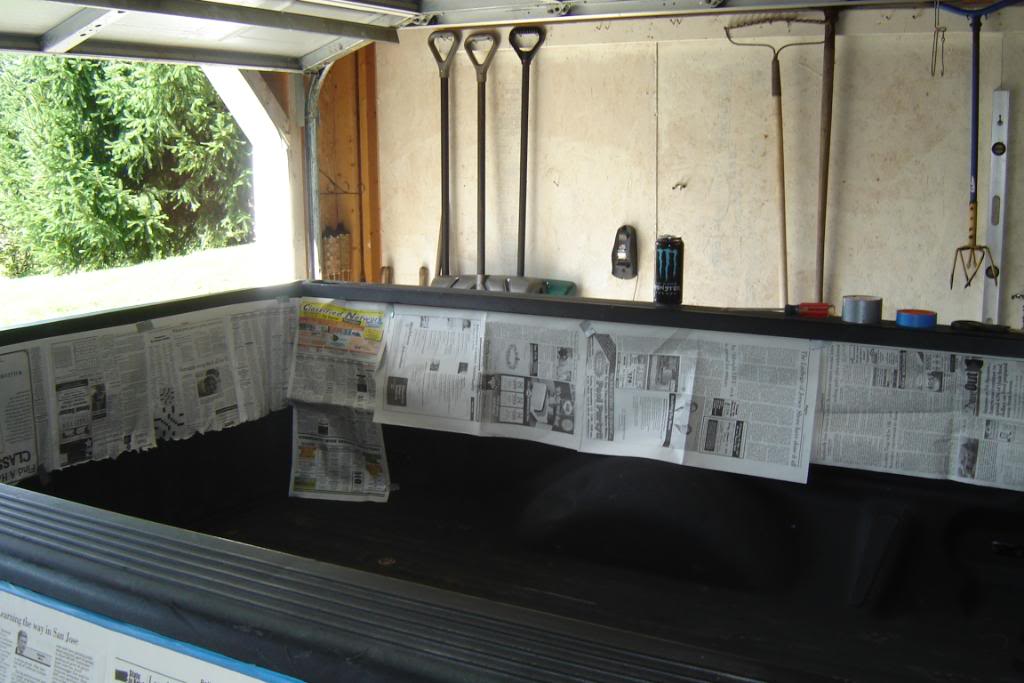
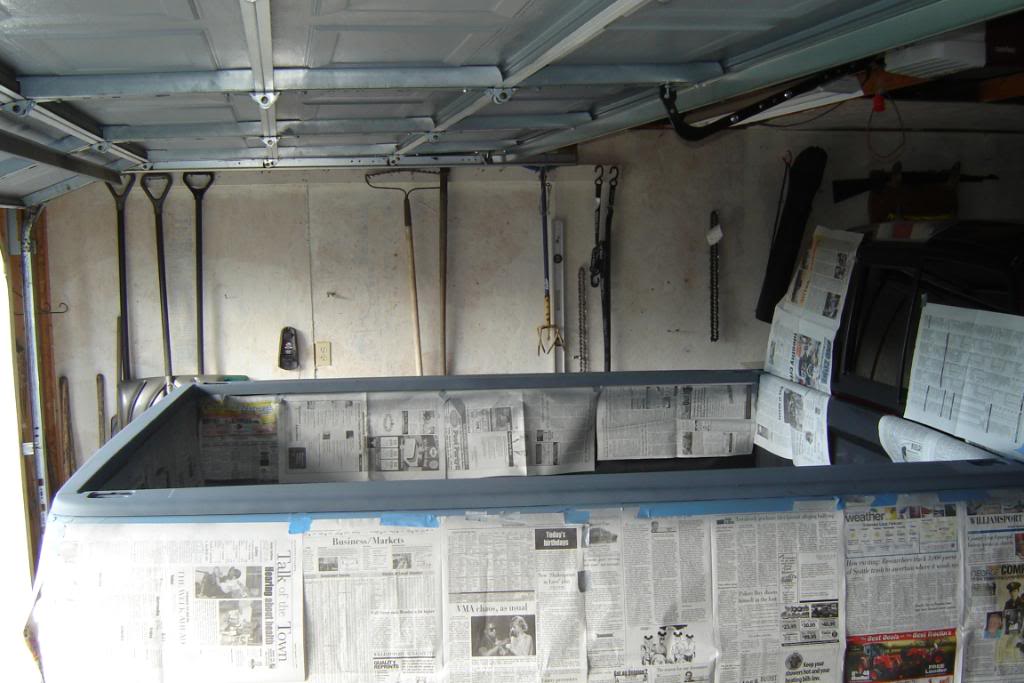
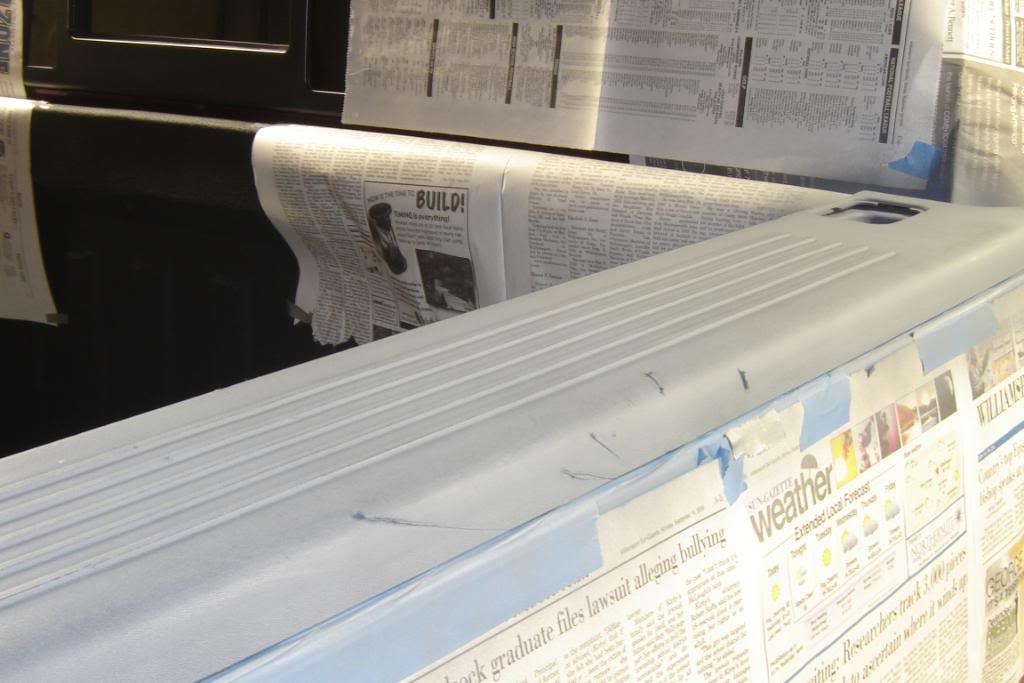
I began by spraying some Simple Green onto a cloth and scrubbing the bed rail caps real well for a thorough cleaning. I did not remove the bed caps because I've never seen it done, and I did not have any glue at hand for re-applying, and did not want to go through a huge hassle. I masked with a small margin of tape under the caps to prevent any over spray and wrapped along the entire truck bed, and tailgate.
( also in the process of painting the rail caps, I was painting the rock guards up front, and on the bed using same method )
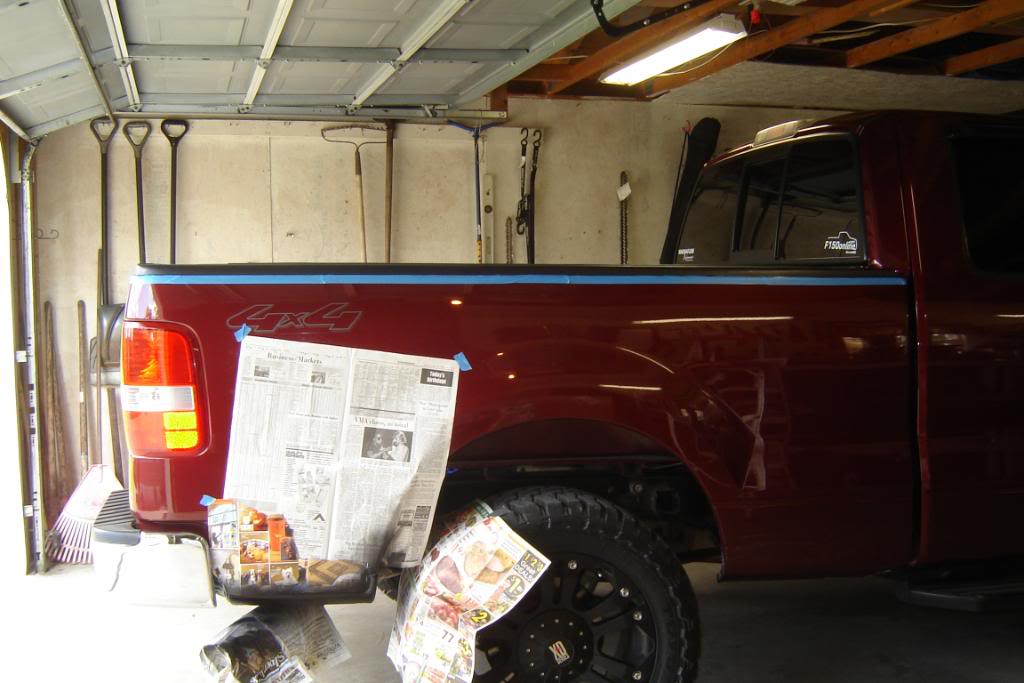
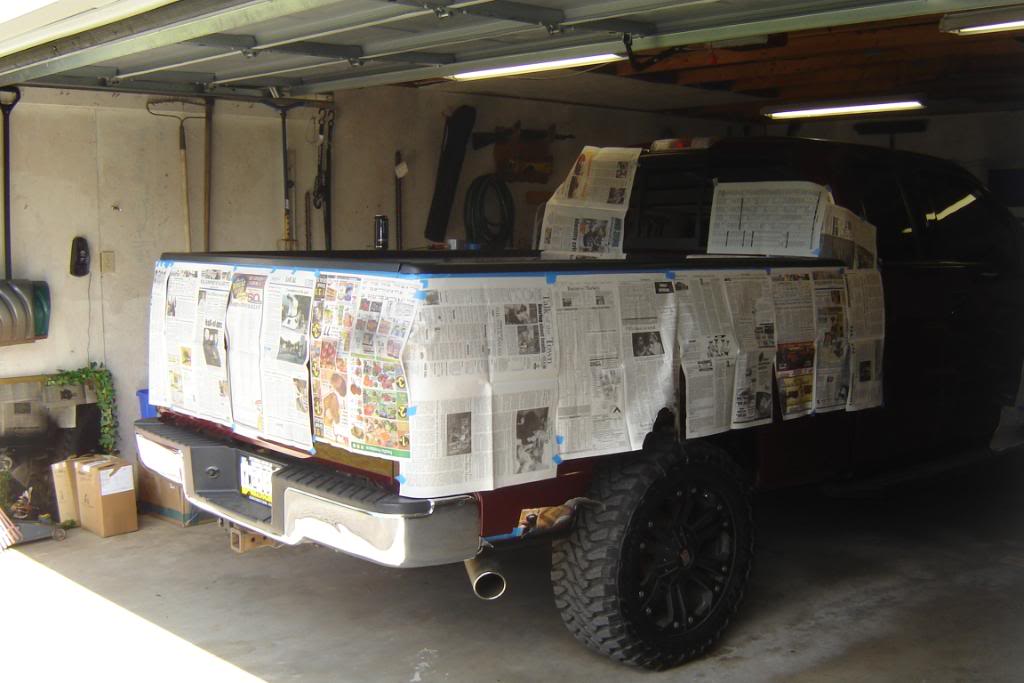
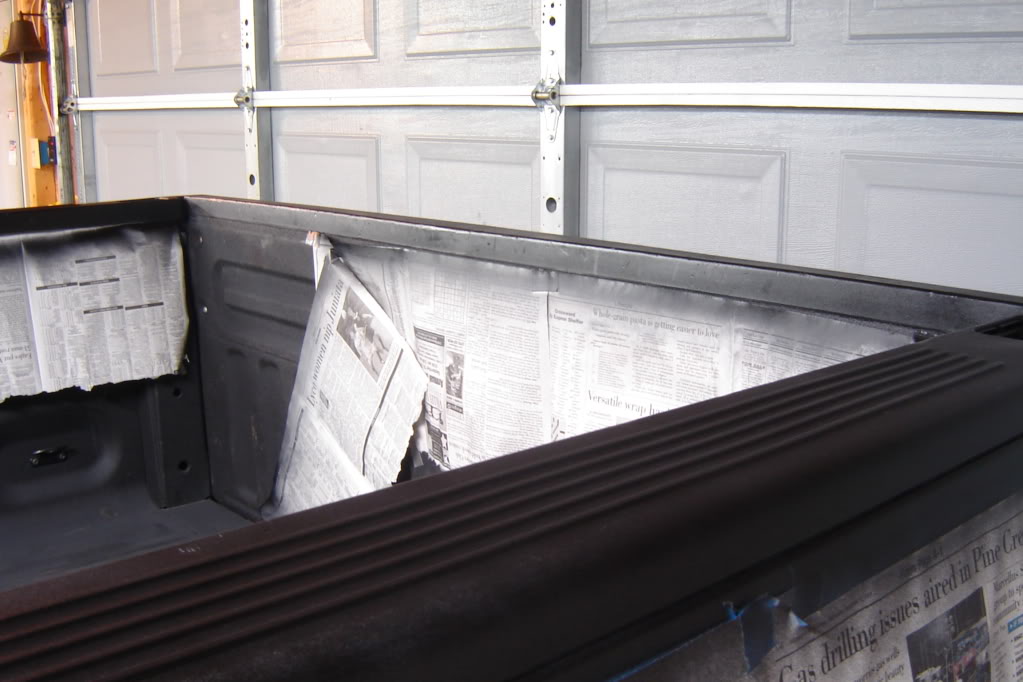
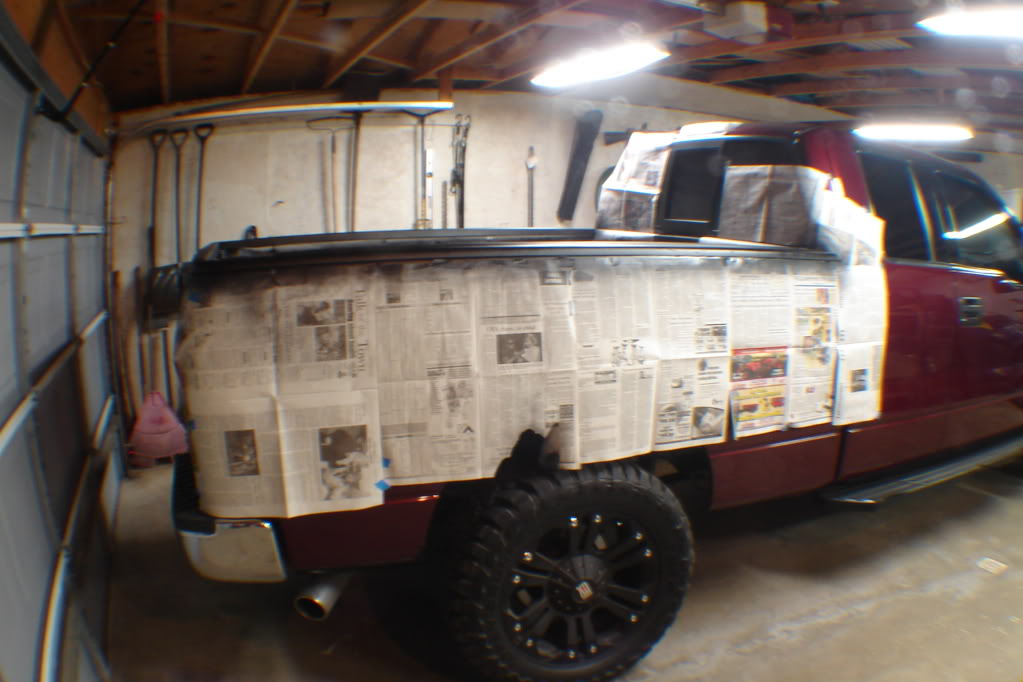
I then grabbed the s$%@ load of news paper, began unfolding and taping it to the truck bed outside, inside, on the tailgate, in the cracks of where the bed and cab meet, and the rear windows.
Second Step, Priming.
Because I could not find any black primer, I settled with the gray Krylon primer. I first sprayed the caps with the adhesion promoter, I did two layers with 10 minute intervals. I did two layers of primer with also 10 minute intervals, and sanded with 1000 grit between layers.

I do have some nicks and etches in my caps, but I did not bother sanding them all down flush.
Third Step, Painting.
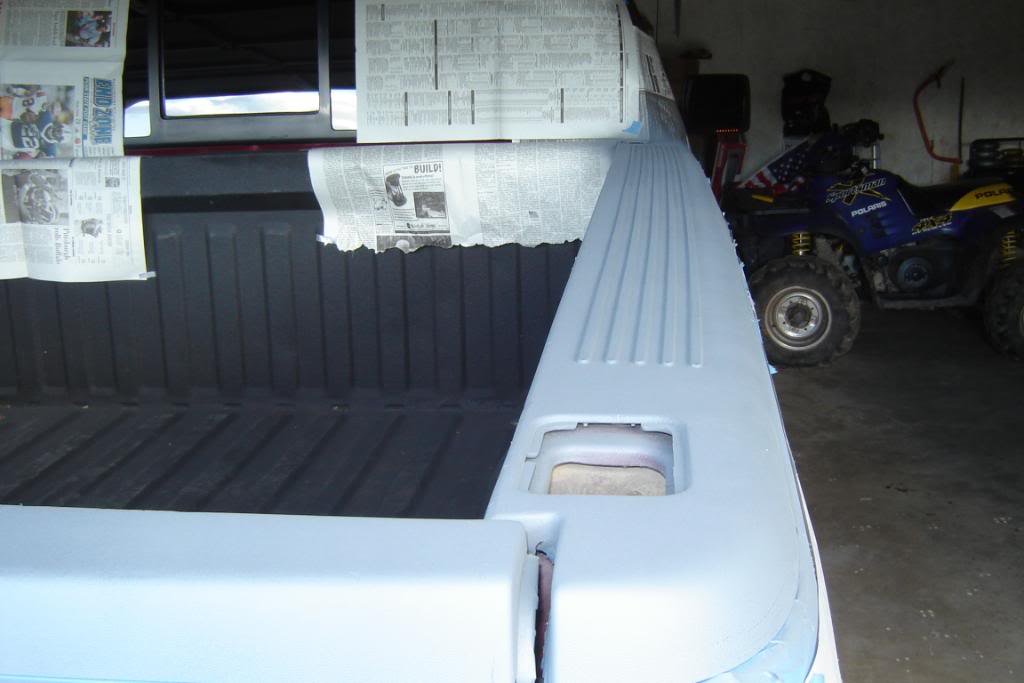
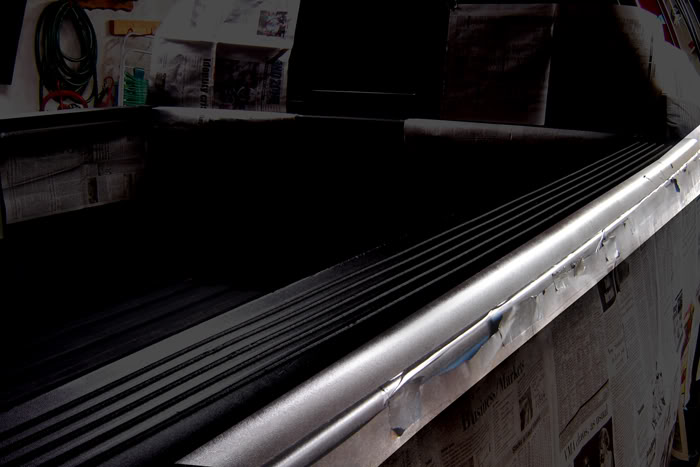
I used everybody's favorite, Krylon Fushion Satin Black for paint. I sprayed the caps once for with adhesion promoter to ensure a definite paint hold. Followed up with the actual paint. I did 3 light layers, 10 minutes in-between, and 1000 grit sanding between layers.


I finished here. I did not use clear coat because I did not have anything with a flat clear finish. I do not want to have glossy looking caps. So far its been 3 months since I have done this and they have held up very well. I will report if any flaking occurs. Winter is just beginning. If anyone knows of a good clear coat that is flat in finish, feel free to post.
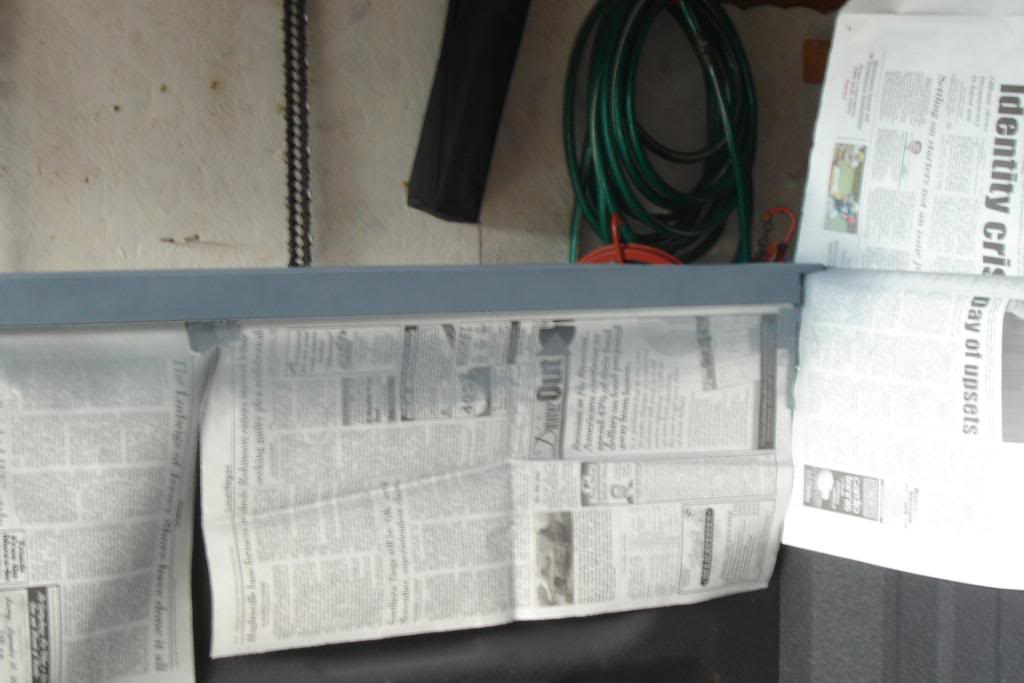
And here is a personal insurance tip. Check this out.
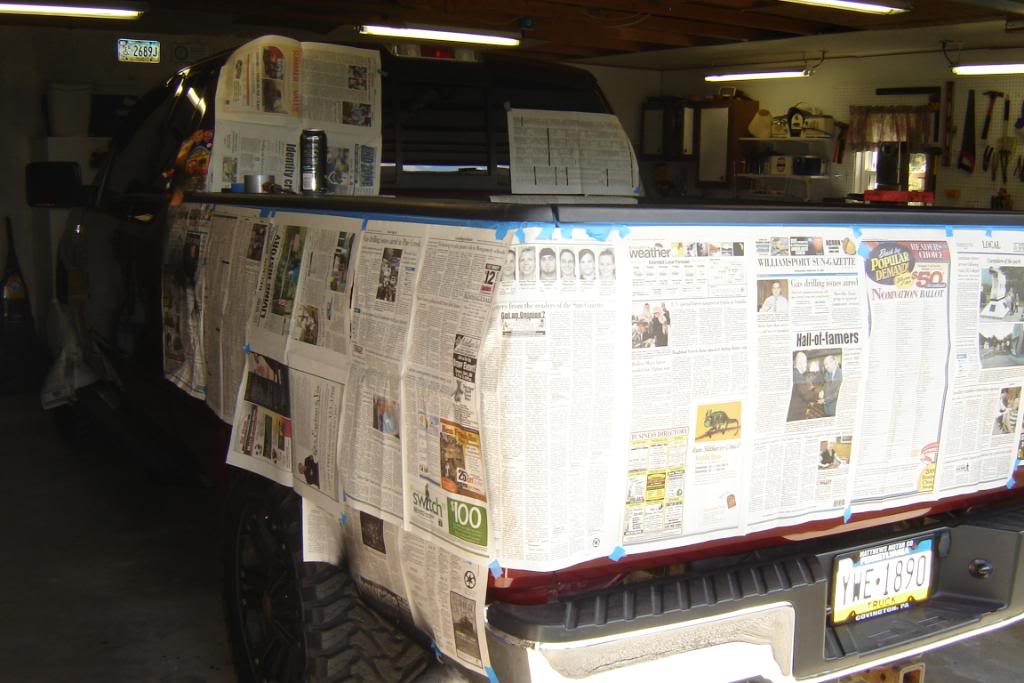
Notice the highlighted area. Remember way up top when I recommended two rolls of painters tape? Yes that does sound like a bit much, but I was working with a half role on my entire job. Incidentally, I should have taped over the top layer of the news paper, but since I ran out of tape and do not have another vehicle to run to the hardware store with, I made do. Well I made a mistake and had some over spray..


So be warned, a second roll of tape wouldn't hurt to buy if you aren't starting off with a brand new roll to begin with. It took me a little over 3 hours to remove all of this. I only had a smooth surface clay kit, and Meguiars Ultimate Rubbing Compound which is what really got this off. I was fortunate to catch this in time before it dried and bonded too long, and very very fortunate to have just done a full detail and fresh wax. Though I had to re-polish, and re-wax my bed after wards. What a labor involved job this was
This concludes my write up .
.
Sick of gray faded trim and tired of applying dressings and dyes that only need to be re-applied after & after? Then paint them! Products used, and necessities..
400, and 1000 Grit Sand Paper
2 Roles of Painters Tape
A S$%@ Load of Newspaper
2 cans of Dupli Color Plastic Adhesion Promoter
1 can of Krylon Grey Primer
2 cans of Krylon Fushion Satin Black
I did not take any before shots, but my caps were pretty faded and white spotted. This is about the closest shot I have displaying a rail cap zoomed in from a different purpose photo.
First Step, Preparation.
I began by spraying some Simple Green onto a cloth and scrubbing the bed rail caps real well for a thorough cleaning. I did not remove the bed caps because I've never seen it done, and I did not have any glue at hand for re-applying, and did not want to go through a huge hassle. I masked with a small margin of tape under the caps to prevent any over spray and wrapped along the entire truck bed, and tailgate.
( also in the process of painting the rail caps, I was painting the rock guards up front, and on the bed using same method )
I then grabbed the s$%@ load of news paper, began unfolding and taping it to the truck bed outside, inside, on the tailgate, in the cracks of where the bed and cab meet, and the rear windows.
Second Step, Priming.
Because I could not find any black primer, I settled with the gray Krylon primer. I first sprayed the caps with the adhesion promoter, I did two layers with 10 minute intervals. I did two layers of primer with also 10 minute intervals, and sanded with 1000 grit between layers.
I do have some nicks and etches in my caps, but I did not bother sanding them all down flush.
Third Step, Painting.
I used everybody's favorite, Krylon Fushion Satin Black for paint. I sprayed the caps once for with adhesion promoter to ensure a definite paint hold. Followed up with the actual paint. I did 3 light layers, 10 minutes in-between, and 1000 grit sanding between layers.
I finished here. I did not use clear coat because I did not have anything with a flat clear finish. I do not want to have glossy looking caps. So far its been 3 months since I have done this and they have held up very well. I will report if any flaking occurs. Winter is just beginning. If anyone knows of a good clear coat that is flat in finish, feel free to post.
And here is a personal insurance tip. Check this out.
Notice the highlighted area. Remember way up top when I recommended two rolls of painters tape? Yes that does sound like a bit much, but I was working with a half role on my entire job. Incidentally, I should have taped over the top layer of the news paper, but since I ran out of tape and do not have another vehicle to run to the hardware store with, I made do. Well I made a mistake and had some over spray..
So be warned, a second roll of tape wouldn't hurt to buy if you aren't starting off with a brand new roll to begin with. It took me a little over 3 hours to remove all of this. I only had a smooth surface clay kit, and Meguiars Ultimate Rubbing Compound which is what really got this off. I was fortunate to catch this in time before it dried and bonded too long, and very very fortunate to have just done a full detail and fresh wax. Though I had to re-polish, and re-wax my bed after wards. What a labor involved job this was
This concludes my write up
.


#5
11-15-2009, 01:22 PM

Nice write-up. I'll do mine when I get a chance.
Reading and looking at the pictures I was about to comment on the single layer of newspaper. When I painted my fender flares I ran into the same problem (lesson learned the hard way). Luckily the black over spray doesn't show up very well on black paint.
So yes, anyone that does this please tape down the newspaper and even double or triple layer it.
#6
11-15-2009, 01:30 PM

Nice write-up. I'll do mine when I get a chance.
Reading and looking at the pictures I was about to comment on the single layer of newspaper. When I painted my fender flares I ran into the same problem (lesson learned the hard way). Luckily the black over spray doesn't show up very well on black paint.
So yes, anyone that does this please tape down the newspaper and even double or triple layer it.
Reading and looking at the pictures I was about to comment on the single layer of newspaper. When I painted my fender flares I ran into the same problem (lesson learned the hard way). Luckily the black over spray doesn't show up very well on black paint.
So yes, anyone that does this please tape down the newspaper and even double or triple layer it.
__________________
Jim
Jim
#7
11-15-2009, 02:58 PM

Senior Member
Join Date: May 2009
Location: Tarpon Springs, FL, USA
Posts: 467
Likes: 0
Received 0 Likes
on
0 Posts
Trending Topics
#8
11-15-2009, 10:10 PM
#9
11-15-2009, 11:15 PM

Member
Join Date: Jun 2005
Location: Los Banos, CA
Posts: 80
Likes: 0
Received 0 Likes
on
0 Posts
#10
11-16-2009, 10:39 AM
Senior Member
Join Date: May 2005
Location: Southern, CA
Posts: 1,514
Likes: 0
Received 0 Likes
on
0 Posts
Looks good and excellent effort!! On my '05 I replaced the bed rail, tailgate and cowl cover plastic at about the 3 year mark. I had a black truck parked in the SoCal sun all the time and it eventually faded and turned the plastic brittle. Not really too expensive and very easy to do. Anyone who is going to be removing the bed rail caps...make note - the plastice tabs that hold them in are VERY easy to break off...take your time - but even taking my time quite a few of the tabs broke off in the removal process.

#12
11-16-2009, 04:00 PM
Senior Member
Looks good! Well done. I did pretty much the same thing (a bit less on the prep side) to my wiper cowl. As an experiment I only clear coated one side of the cowl. After 2 years or so, the side without clear looks like crap. Alot of the paint has come off, but the clear coated side still looks pretty darn good!

Do you happen to have part numbers or costs?
- NCSU
- NCSU
#13
11-16-2009, 07:54 PM
Senior Member
Join Date: May 2005
Location: Southern, CA
Posts: 1,514
Likes: 0
Received 0 Likes
on
0 Posts
Looks good! Well done. I did pretty much the same thing (a bit less on the prep side) to my wiper cowl. As an experiment I only clear coated one side of the cowl. After 2 years or so, the side without clear looks like crap. Alot of the paint has come off, but the clear coated side still looks pretty darn good!
Do you happen to have part numbers or costs?
- NCSU
Do you happen to have part numbers or costs?
- NCSU
You have a PM!!
#14
11-17-2009, 01:07 PM

Member
Join Date: Nov 2009
Location: champagin, il
Posts: 18
Likes: 0
Received 0 Likes
on
0 Posts
