
 04-13-2015, 02:28 PM
Last edit by: IB Advertising
Replacing you rear axle seals and bearings
This helpful guide with ease the process of this difficult task with pictures, detailed intrusions, and tools needed to complete the task.
Read full discussion for further information
This helpful guide with ease the process of this difficult task with pictures, detailed intrusions, and tools needed to complete the task.
Read full discussion for further information

How to replace rear axle seals and bearings in your 04+ F150 (lots of pics)
#1
06-23-2007, 12:07 PM


How to replace rear axle seals and bearings in your 04+ F150 (lots of pics)
I was changing the oil in my truck earlier last week and saw that my right rear axle seal was leaking. So I figured what the hell, I'll do a how-to thread for replacing axle seals and bearings. While this was specifically done on a 2004 F150 with a 9.75 axle, 8.8s are very similar.
First thing's first, the parts:
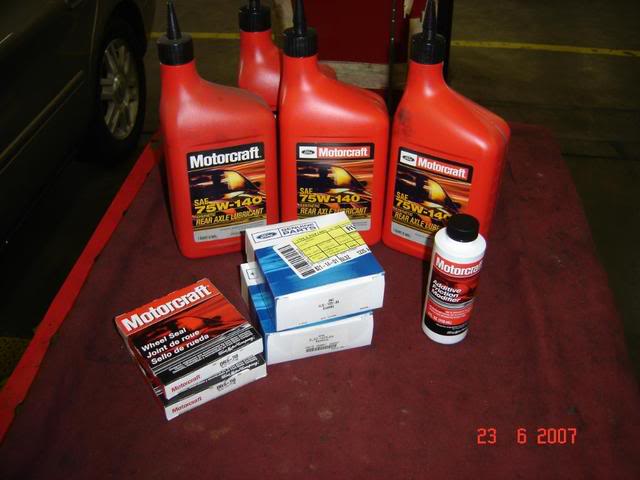
Front row, from left to right - the axle seals themselves (p/n 5L3Z-1S177-AB, about $6.05/ea), the axle bearings (p/n 5L3Z-1225-AA, about $67.00/ea), and for limited slip differentials, one bottle of friction modifier (p/n XL-3, about $10.00) and four quarts of 75W140 gear oil.
Tools used:
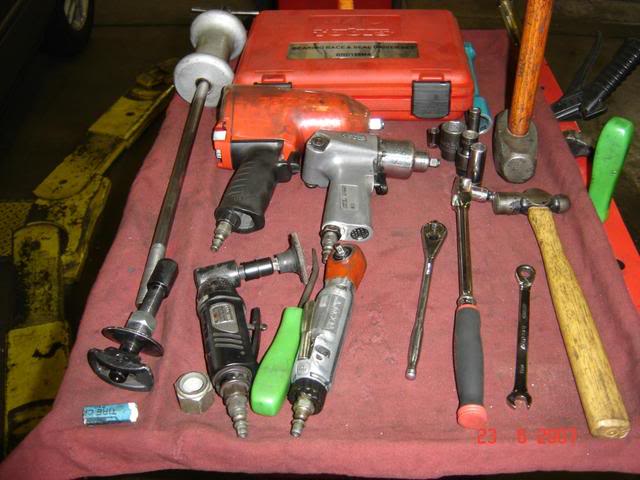
You may or may not have access to an air compressor, so disregard the air tools in that picture if you don't. This can all be done with hand tools, it'll just take a little longer. You'll want a breaker bar and a 21mm socket for removing the wheels; a 10mm socket or ratchet wrench for removing the calipers; a BFH for beating the rotors off (if necessary, mine just slid off) and for beating the new bearings and seals in; a 6 point (more on why a 6 point later) 3/8" wrench or socket; a 13mm socket for removing the bolts that hold the rear axle cover on; a couple of standard prybars; a rolling head prybar; and a slide hammer and axle bearing puller. In the red case is a set of bearing and seal drivers - not absolutely necessary, but nice to have.
First of course, you've got to get your truck in the air.
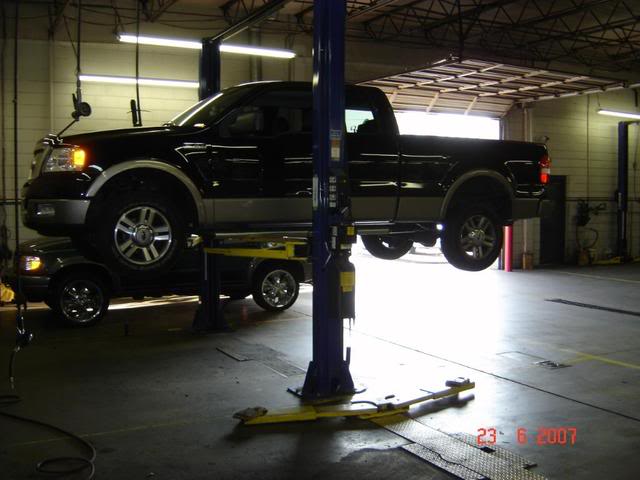
Important safety tip guys: If you're doing this in your driveway, secure your truck. You're gonna be underneath 2-1/2+ tons of vehicle, I don't want to see anyone get hurt. Good jack stands in the rear, and chock the wheels in the front. Continued in next post...
First thing's first, the parts:
Front row, from left to right - the axle seals themselves (p/n 5L3Z-1S177-AB, about $6.05/ea), the axle bearings (p/n 5L3Z-1225-AA, about $67.00/ea), and for limited slip differentials, one bottle of friction modifier (p/n XL-3, about $10.00) and four quarts of 75W140 gear oil.
Tools used:
You may or may not have access to an air compressor, so disregard the air tools in that picture if you don't. This can all be done with hand tools, it'll just take a little longer. You'll want a breaker bar and a 21mm socket for removing the wheels; a 10mm socket or ratchet wrench for removing the calipers; a BFH for beating the rotors off (if necessary, mine just slid off) and for beating the new bearings and seals in; a 6 point (more on why a 6 point later) 3/8" wrench or socket; a 13mm socket for removing the bolts that hold the rear axle cover on; a couple of standard prybars; a rolling head prybar; and a slide hammer and axle bearing puller. In the red case is a set of bearing and seal drivers - not absolutely necessary, but nice to have.
First of course, you've got to get your truck in the air.
Important safety tip guys: If you're doing this in your driveway, secure your truck. You're gonna be underneath 2-1/2+ tons of vehicle, I don't want to see anyone get hurt. Good jack stands in the rear, and chock the wheels in the front. Continued in next post...
#2
06-23-2007, 12:12 PM
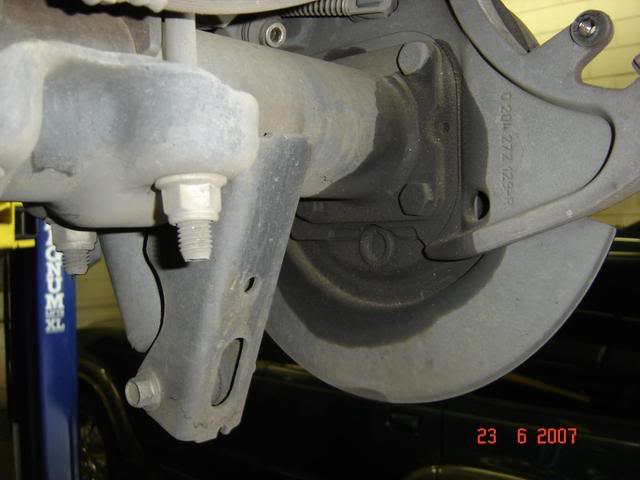
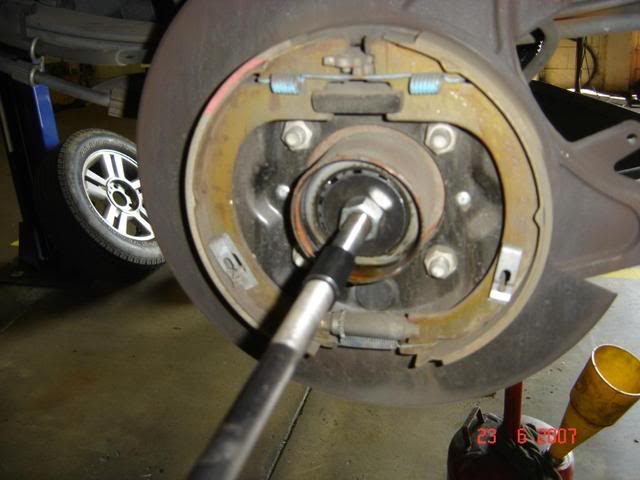
With your truck securely lifted, you're gonna want to pop the trans into neutral so you can spin the pinion around, and pull the rear wheels off. Once the rear wheels are off, you're gonna need to remove the brakes. The calipers are held on with two 10mm bolts as shown in this picture:
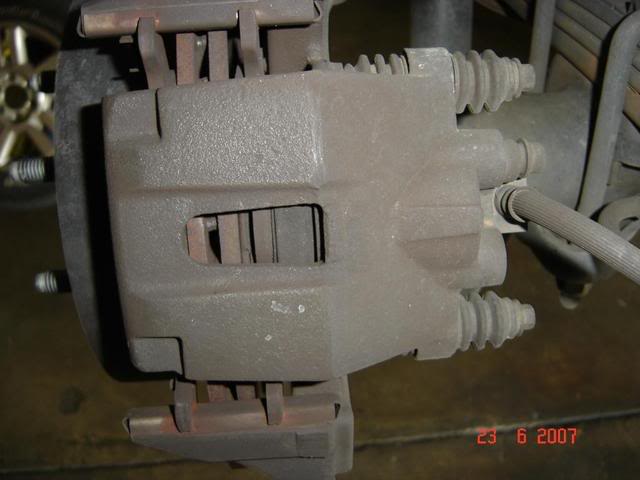
Remove those bolts, and the calipers. Next, pull the rotors (you may have to whack the face of 'em with a hammer to get them to break loose) and now you've gotta go underneath the truck.
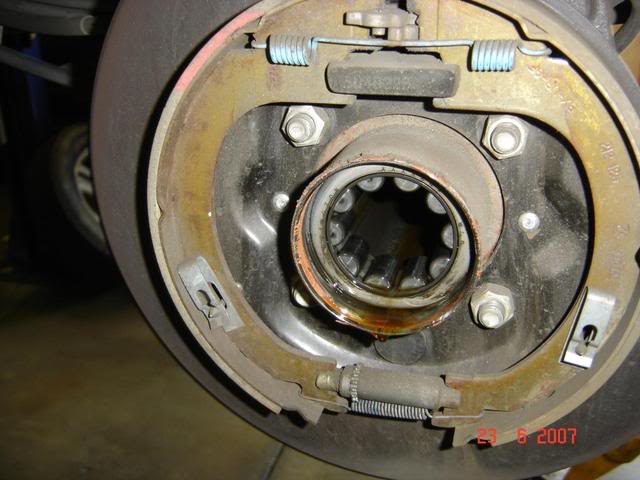
The right seal was the only one leaking in mine, but I replaced them both and the axle bearings while I was in there. Okay, next you need to remove the rear axle cover.
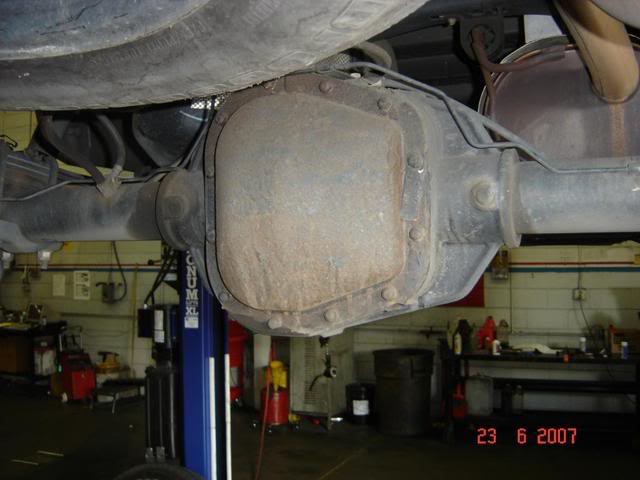
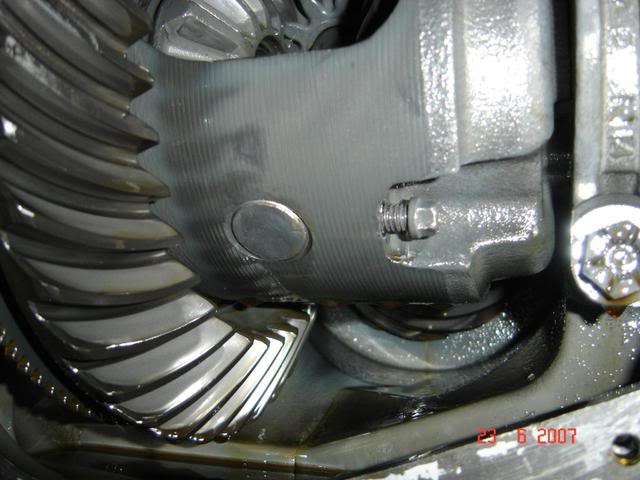
There's twelve 13mm bolts holding it on. You'll probably have to remove the clamp holding the rear brake line in place on the rear axle housing on top of the housing (one 13mm bolt) to get enough room to get a socket on one of the top most rear axle cover bolts.
Remove those bolts, and the calipers. Next, pull the rotors (you may have to whack the face of 'em with a hammer to get them to break loose) and now you've gotta go underneath the truck.
The right seal was the only one leaking in mine, but I replaced them both and the axle bearings while I was in there. Okay, next you need to remove the rear axle cover.
There's twelve 13mm bolts holding it on. You'll probably have to remove the clamp holding the rear brake line in place on the rear axle housing on top of the housing (one 13mm bolt) to get enough room to get a socket on one of the top most rear axle cover bolts.
#3
06-23-2007, 12:17 PM
The sealant holding the cover on is pretty hard stuff. I hammered a putty knife in between the cover and housing to get the seal to break. Don't forget to have a drain pan under the pumpkin before you finally get the cover off. I recommend leaving one of the top bolts in a couple of turns while you're breaking the cover loose too, that way it won't fall all of a sudden into a pan full of gear oil, making a big mess. After the axle is drained, remove the cover and set it aside.
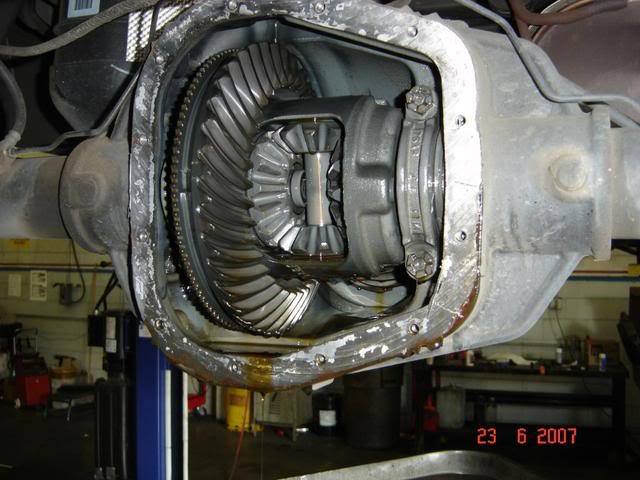
With the rear axle cover off, you're now gonna want to rotate the pinion flange around to get to the pinion shaft retaining bolt, as shown below:
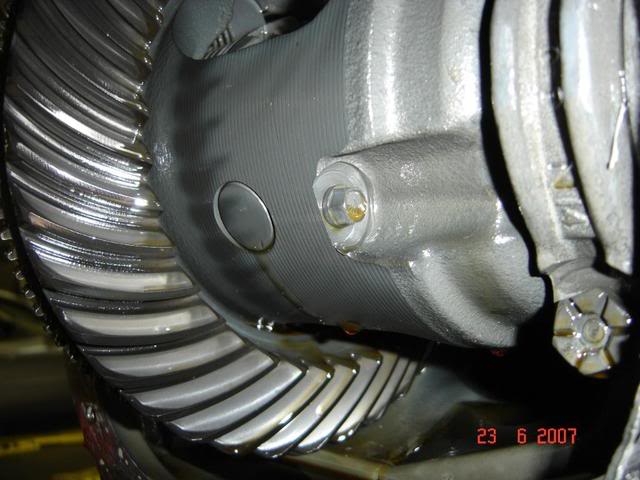
This bolt is loctited in from the factory, so sometimes it can be kinda tough to get out. Hence why I recommended earlier to use a good six point socket or wrench on this bolt. It's a 3/8, and you may have to use a prybar wedged against the carrier/ring gear to get enough leverage to get it to break loose, like the picture below:

With the rear axle cover off, you're now gonna want to rotate the pinion flange around to get to the pinion shaft retaining bolt, as shown below:
This bolt is loctited in from the factory, so sometimes it can be kinda tough to get out. Hence why I recommended earlier to use a good six point socket or wrench on this bolt. It's a 3/8, and you may have to use a prybar wedged against the carrier/ring gear to get enough leverage to get it to break loose, like the picture below:
#4
06-23-2007, 12:21 PM
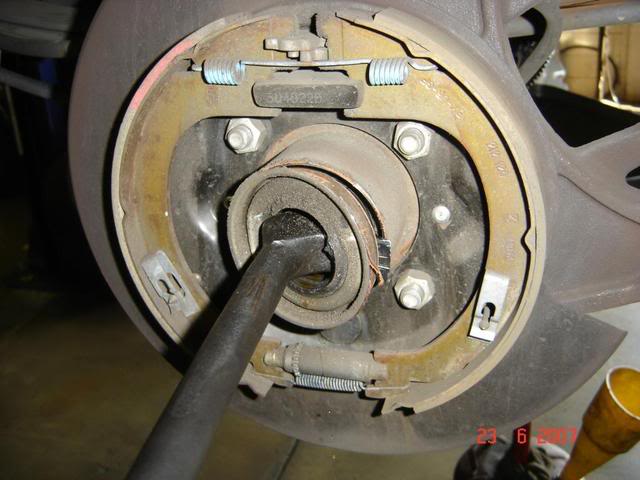
After removing the pinion shaft retaining bolt, you're gonna want to slide the pinion shaft out towards you. Sometimes this shaft will fall right out after removing the bolt. Once the shaft is out, go to either side of the truck and push the wheel flanges straight in. This'll allow you to remove the C-clips so you can pull the axle shaft out of the housing.
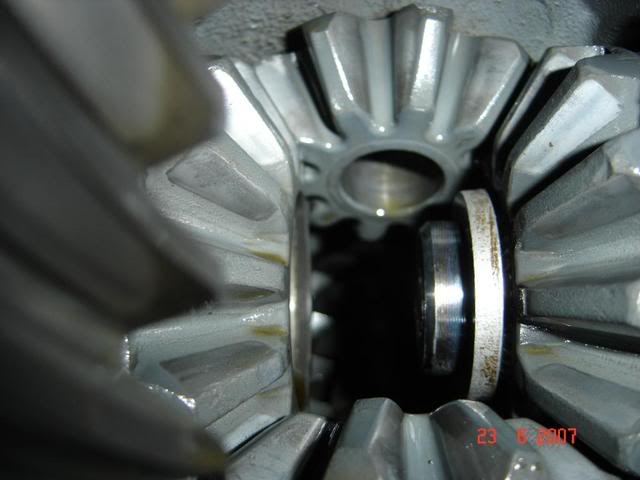
Once the C-clip is out on one side, repeat on the other, then pull the axle shafts straight out.
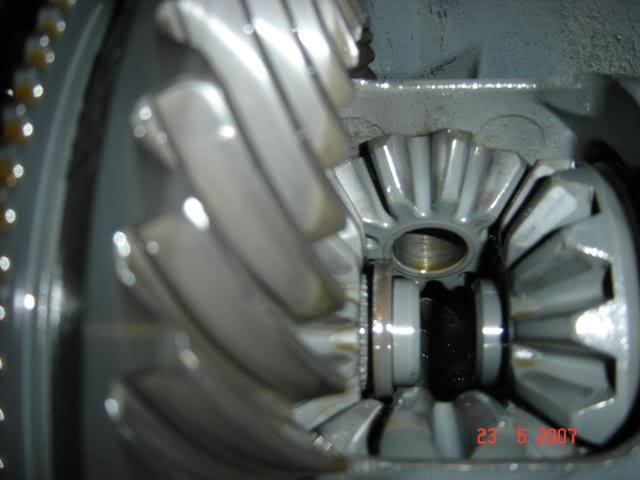
Once the axle shafts are out, I like to reinstall the pinion shaft and start the bolt a couple turns so the spider gears don't turn while I'm doing other things. If the spiders turn without the axle shafts in the carrier, they can be a bitch to get lined back up, especially with a limited slip axle.
Once the C-clip is out on one side, repeat on the other, then pull the axle shafts straight out.
Once the axle shafts are out, I like to reinstall the pinion shaft and start the bolt a couple turns so the spider gears don't turn while I'm doing other things. If the spiders turn without the axle shafts in the carrier, they can be a bitch to get lined back up, especially with a limited slip axle.
#5
06-23-2007, 12:24 PM
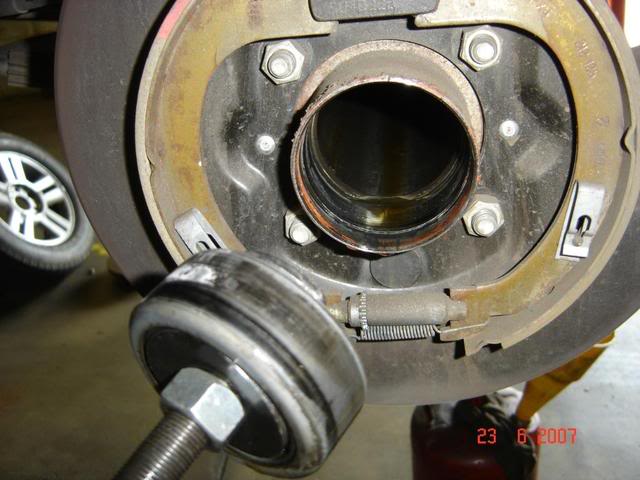
Okay, now you're ready to ****** the axle seals out. There's a variety of special pullers you can buy/borrow to remove the seal, but I've found that a big rolling head prybar works best. Insert the hooked end of the prybar like so...
Then pull the bar outwards and forwards...
And huzzah! The seal is out.
If all you're gonna replace is the axle seal(s), you don't have to go any further. Use a rag to wipe up the excess axle oil and junk around the axle tube and beat the new seal in with a hammer. If you're gonna go ahead and replace the axle bearings, keep on reading:
#6
06-23-2007, 12:28 PM
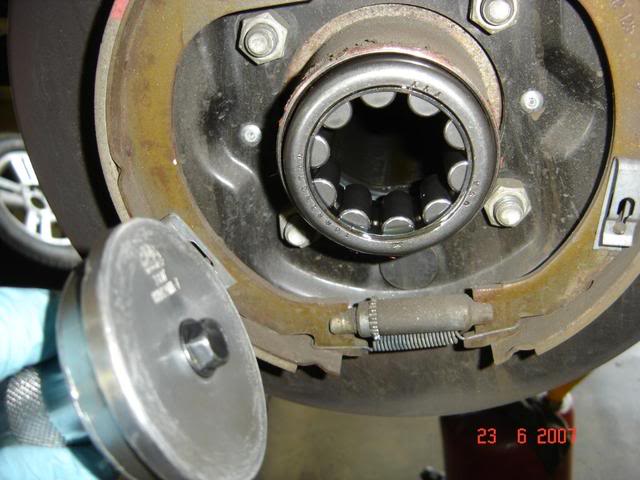
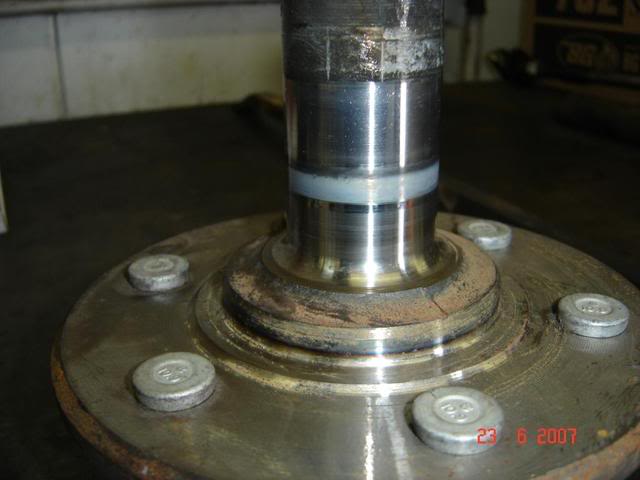
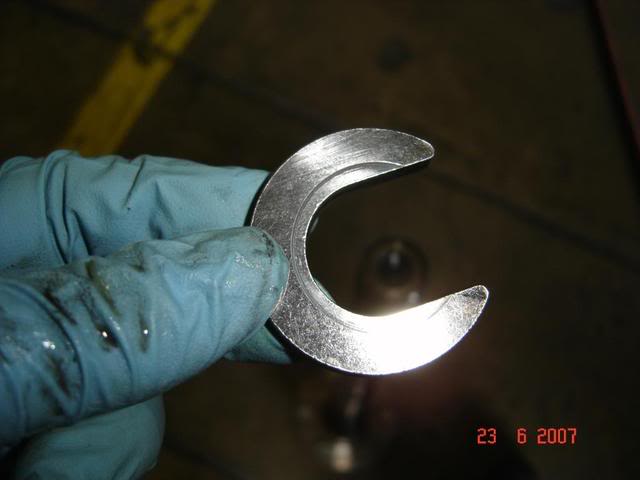
You'll need a special puller and a slide hammer to remove the axle bearing.
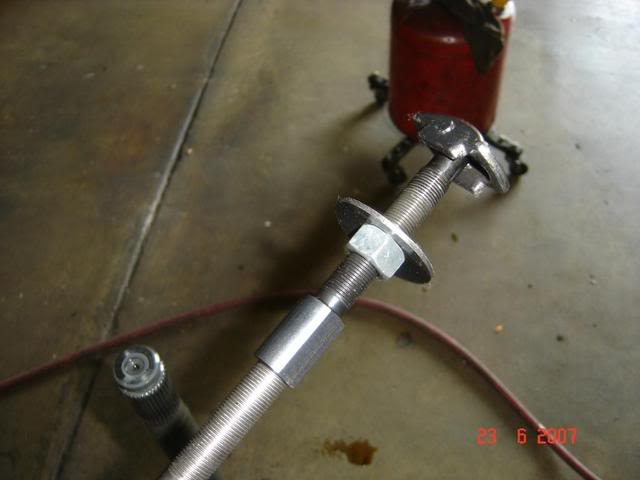
The end of the puller hooks behind the bearing, then you tighten the nut up against the puller and start wailing away with the slide hammer. Note - I have yet to find an axle bearing puller that fits the 9.75 just right. You may not be able to find one either, if not, use the next smallest size. Sometimes the cage may come apart using the smaller puller, if so, no big deal, a three jaw puller can be installed that'll get the rest of the bearing race out. After the bearing it out, look down the tube to be sure no rollers from the bearing is still in there, then clean up the area where the bearing and seal goes with brake cleaner and some rags.
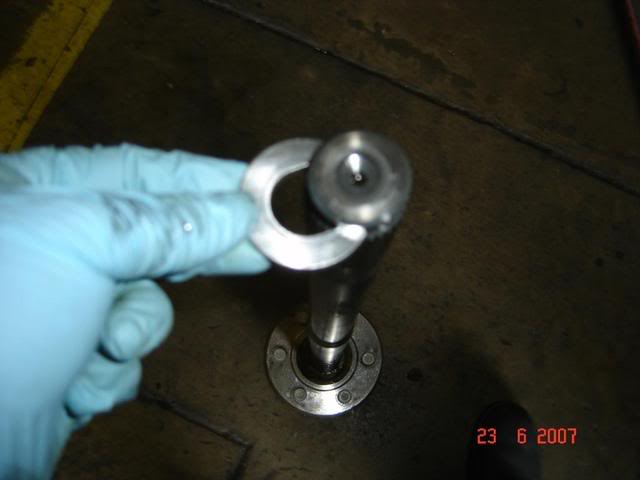
Here's a picture of the bearing puller installed. Note how there's still a gap around the black washer where you can see the rollers in the bearing. That's not how it should be, and I'm still on the search for a proper 9.75" axle bearing puller.
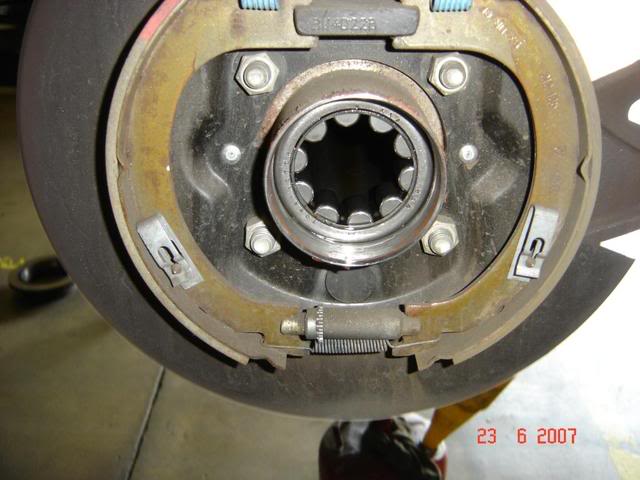
Ideally, this is how the bearing should come out.
The end of the puller hooks behind the bearing, then you tighten the nut up against the puller and start wailing away with the slide hammer. Note - I have yet to find an axle bearing puller that fits the 9.75 just right. You may not be able to find one either, if not, use the next smallest size. Sometimes the cage may come apart using the smaller puller, if so, no big deal, a three jaw puller can be installed that'll get the rest of the bearing race out. After the bearing it out, look down the tube to be sure no rollers from the bearing is still in there, then clean up the area where the bearing and seal goes with brake cleaner and some rags.
Here's a picture of the bearing puller installed. Note how there's still a gap around the black washer where you can see the rollers in the bearing. That's not how it should be, and I'm still on the search for a proper 9.75" axle bearing puller.
Ideally, this is how the bearing should come out.
#7
06-23-2007, 12:32 PM
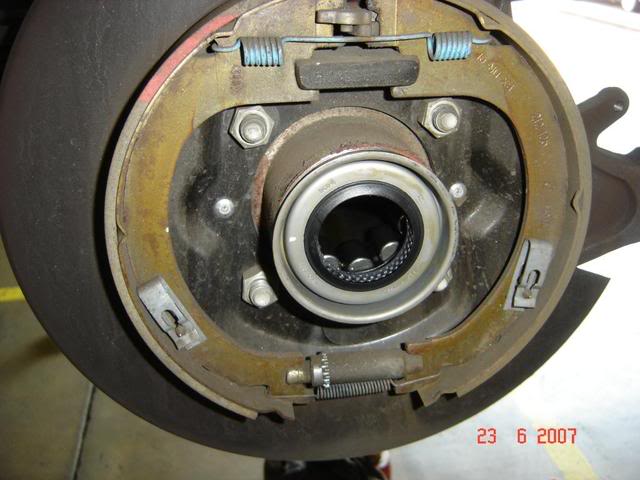
Okay, with the bearing out, now it's time to go back together. Clean the tube up a little, and start the new bearing with a few light taps with a hammer. I like to put a little clean gear oil on the rollers of the new bearing before installing, but it doesn't really matter.
If you have access to a race and bearing driver, now's the time to use it. It'll take a 2.83" adapter to drive the bearings in. If you don't have a bearing driver, no problem, just use the old bearing on top of the new one to drive it home. You'll definitely hear a distinct sound and feel when the bearing is finally bottomed out, it'll look something like this:
Now with the bearing installed, it's time to install the new seal. You can use your bearing/race driver to install the seal, but I normally just walk them in with a hammer.
Trending Topics
#8
06-23-2007, 12:41 PM
Oh yeah, while you've got the axle(s) out, inspect the portion of the shaft where the bearing rides for any pitting or damage. If any is found, the axle must be replaced. Mine look okay.
Okay, just like the book says, "reverse order of disassembly to assemble." Remove the pinion shaft retaining bolt and shaft and slide the axles into the housing so they engage with the carrier. This may take a little fiddling to get. About the C-clips...
Notice how that clip has a wear groove in it? With C-clips, it probably doesn't really matter, but with axles in general I like putting things exactly back where and how they came from. This groove faces away from the wheel when the C-clip is installed.


#11
06-23-2007, 01:15 PM


#12
06-23-2007, 01:43 PM

#13
06-23-2007, 01:49 PM

#14
06-23-2007, 01:57 PM
Originally Posted by Josiah
Very nice quintin, thanks a lot for the details. What does a seal & bearing replacement cost at the dealer? I'm guessing it starts somewhere around an arm and maybe up to a leg. I will end up doing this on my buddy's Dana 60 soon.
#15
06-23-2007, 02:00 PM

Senior Member
Join Date: Feb 2005
Location: Salinas, Ca
Posts: 694
Likes: 0
Received 0 Likes
on
0 Posts
Originally Posted by Josiah
Very nice quintin, thanks a lot for the details. What does a seal & bearing replacement cost at the dealer? I'm guessing it starts somewhere around an arm and maybe up to a leg. I will end up doing this on my buddy's Dana 60 soon.
