2004 - 2008 Broken Fuel Door Replacement How-To
#1
 01-25-2011, 06:41 PM


2004 - 2008 Broken Fuel Door Replacement How-To
Hello. DarrenWS6 here again. Lately my truck has been needing some small repairs, fuel door being one of them. Here is my write up for fixing this very embarrassing issue which takes only 5 minutes of your time.
Photos were taken with my BlackBerry Storm2 9550, not the greatest photos. Plus the truck is filthy from January winter
Required Tools.
Replacement fuel door HOUSING assembly, part #4L3Z-9927936-BA
2 small flat head screw drivers.
A 7mm six point socket with a long extension ( 1/4" drive is safest ) Or a socket wrench screw driver
Optional Yet Useful
Mechanix gloves.
Work light.
The fuel door housing ran me $35 + tax at my local dealership.
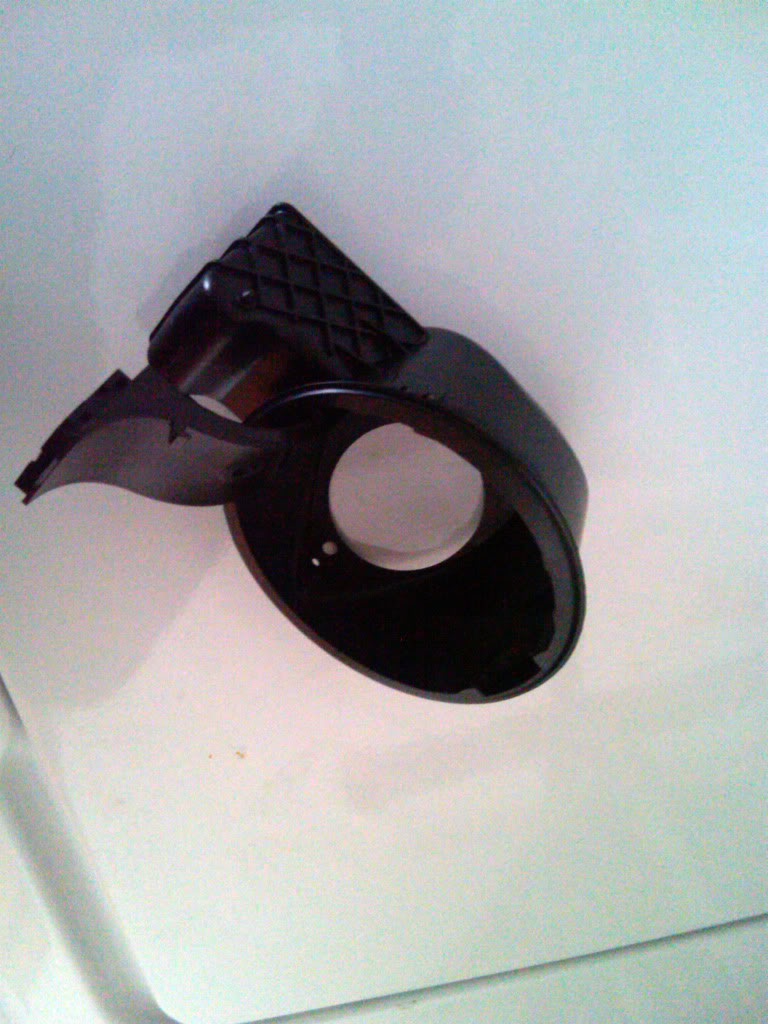
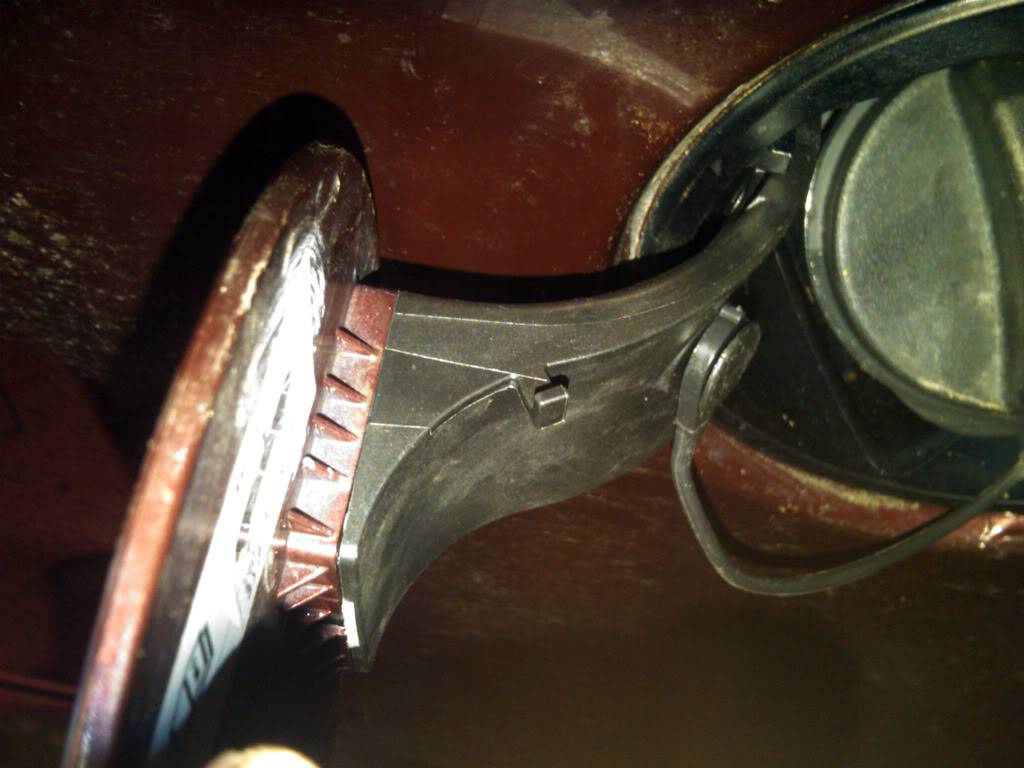
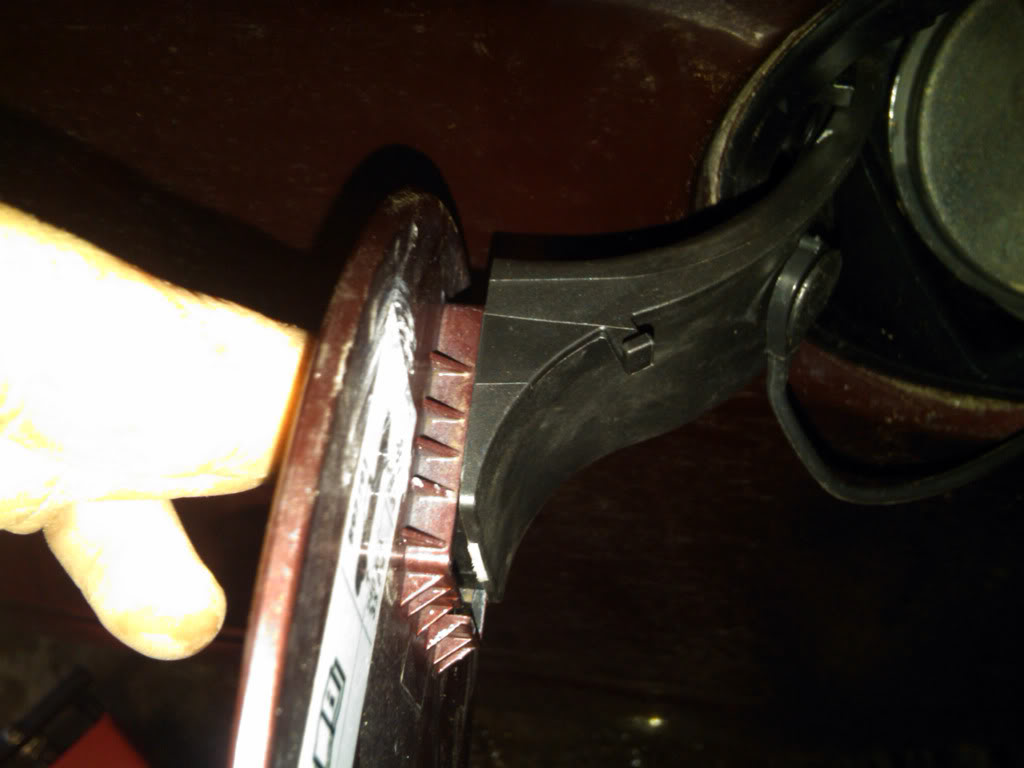
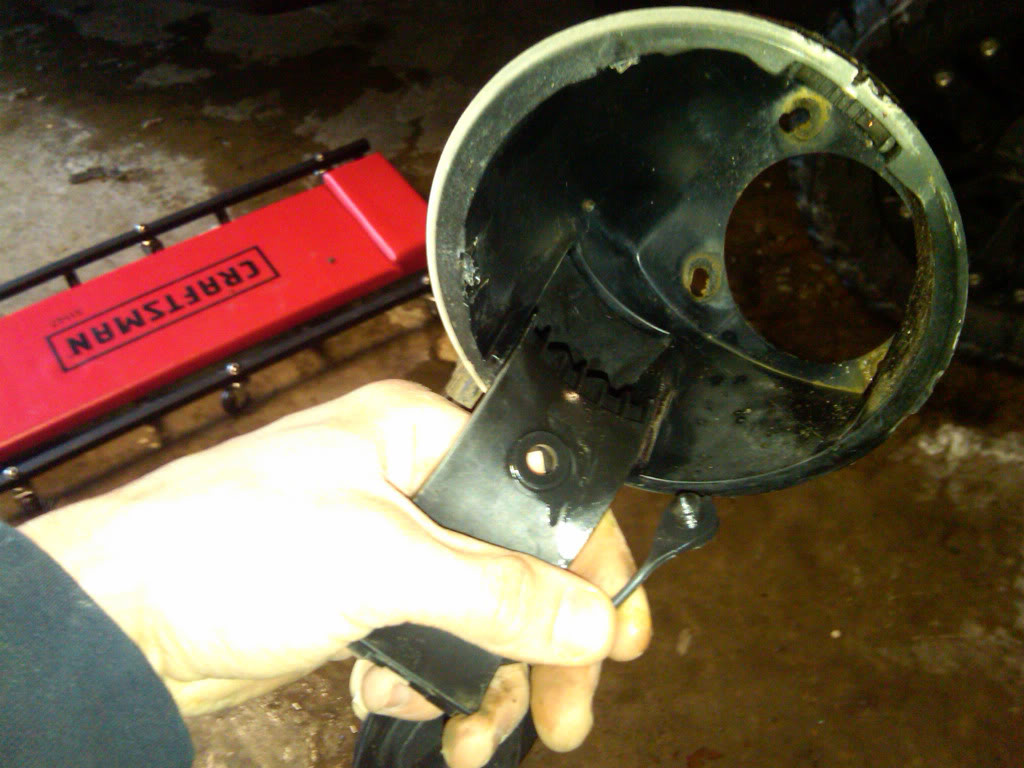
First off, i'll show you why it failed. These aren't as superior as the '97 - '03 steel units, they are 100% plastic, fuel door cap and housing. There is this curved metal spring on the bottom of the exterior of the housing, the plastic mount on this piece breaks, therefor, you must replace the entire housing to fix the issue. Here is a compare photo from my old housing to the brand new one to show.
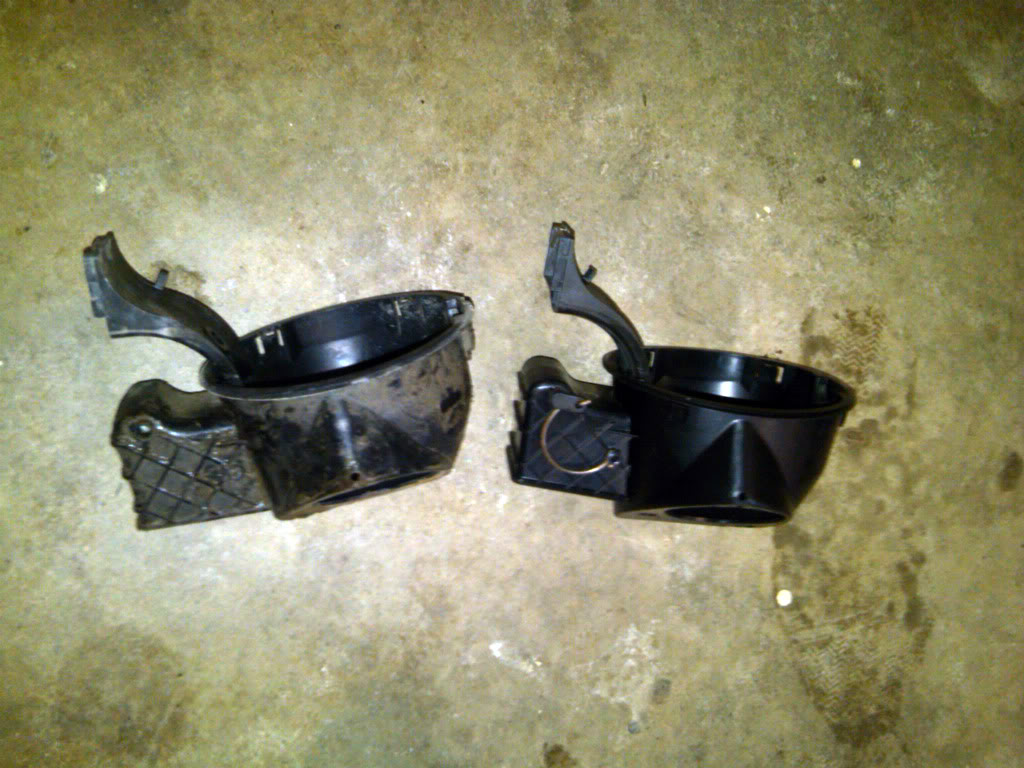
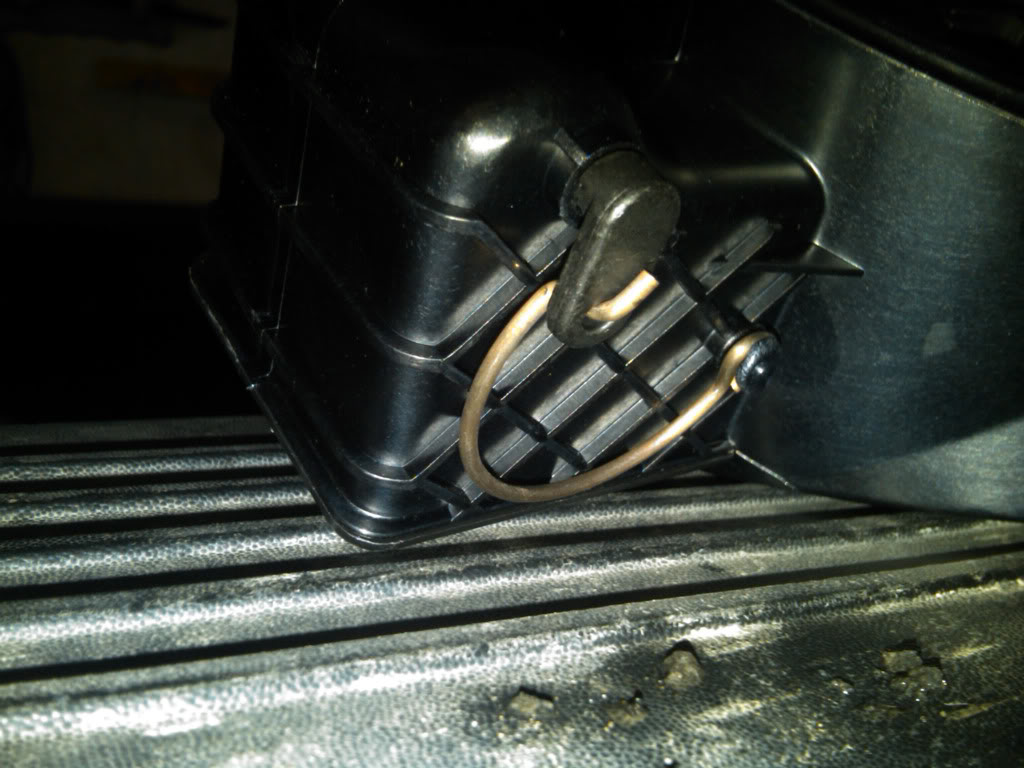
The design of this was a good one for the company to make some money profit come repair time IMO.
Replacement:
First, you must remove your fuel cap and hang it. Then with your 7mm socket remove the 3 bolts holding the fuel tank filler neck to the housing.
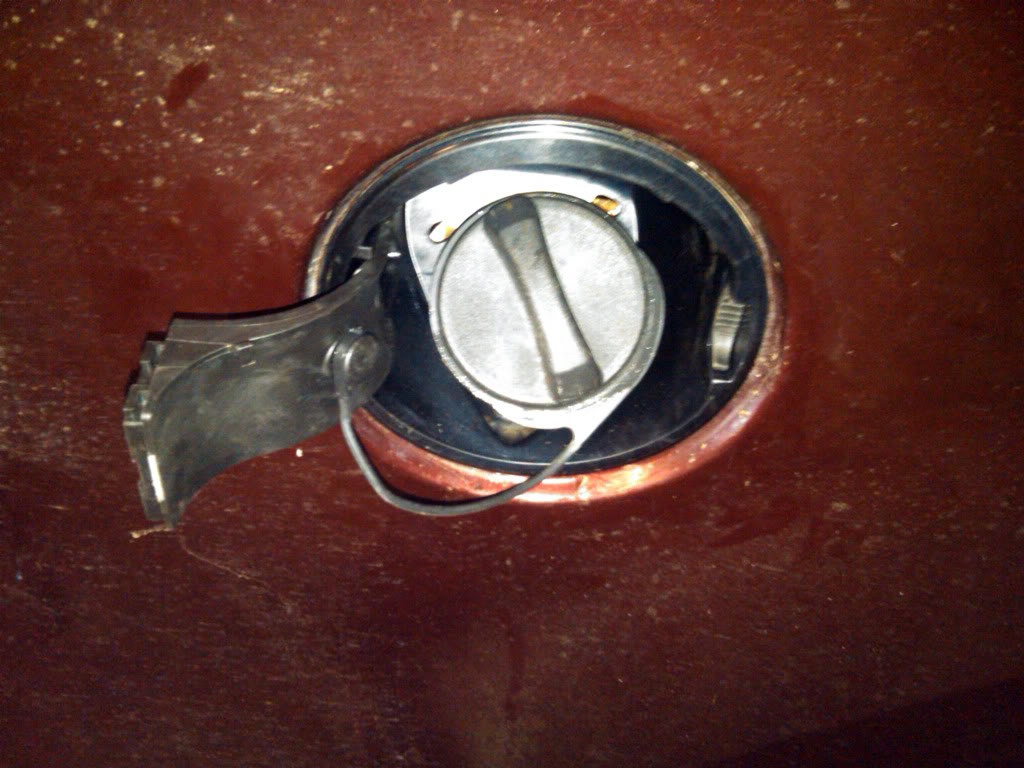
Second, remove your fuel door cap by inserting a small flat screw driver into the little slot between the door and plastic hinge. Push the screw driver towards the door cap and slowly, gently, pull it towards yourself and it will slide forward, as seen here.
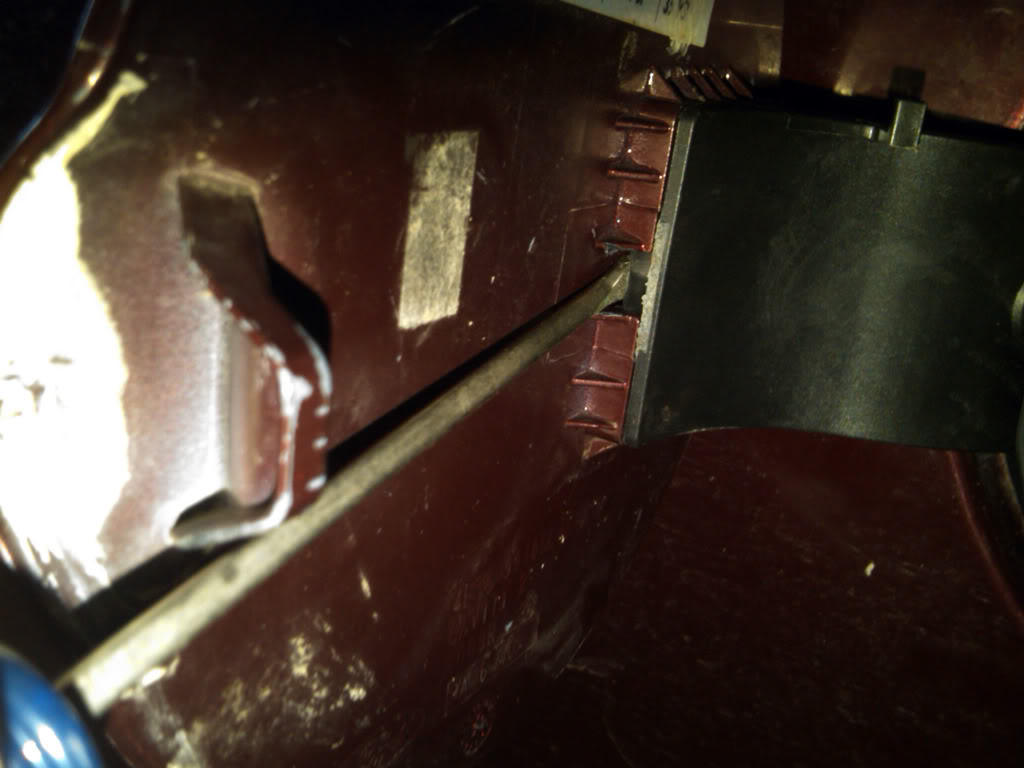
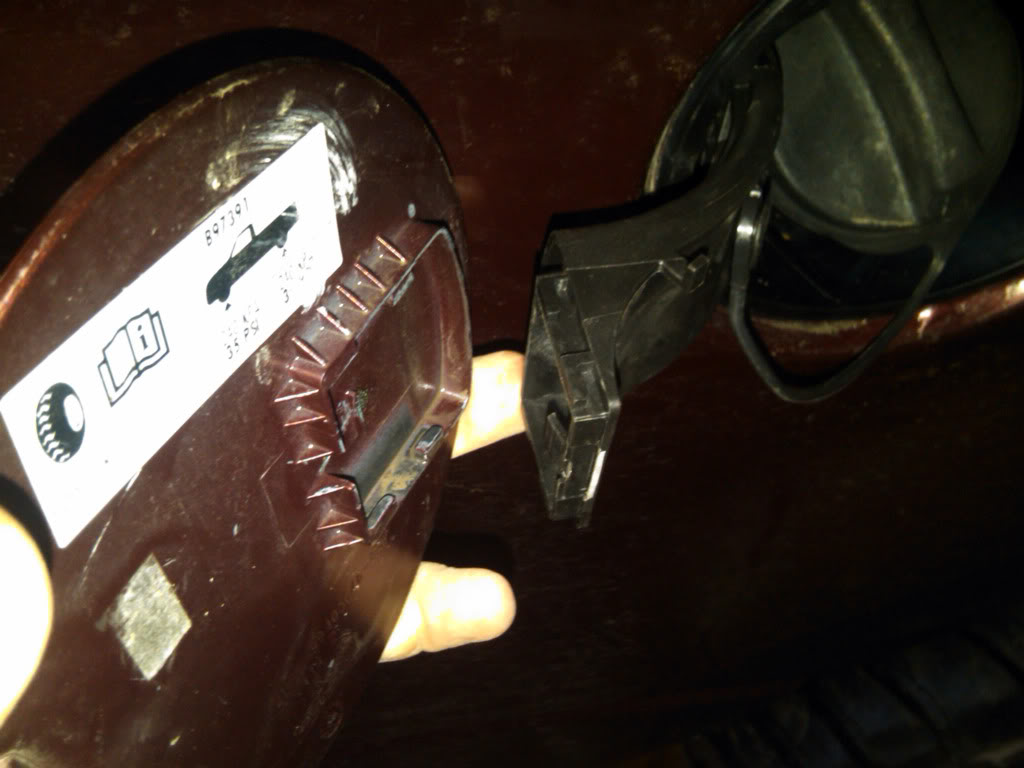
Then pull it off gently.
I thank and credit Shifty219 for teaching me how to do this part and displaying how to before I attempted it on my own. In situations involving plastic, sometimes you just should not 'wing it'.
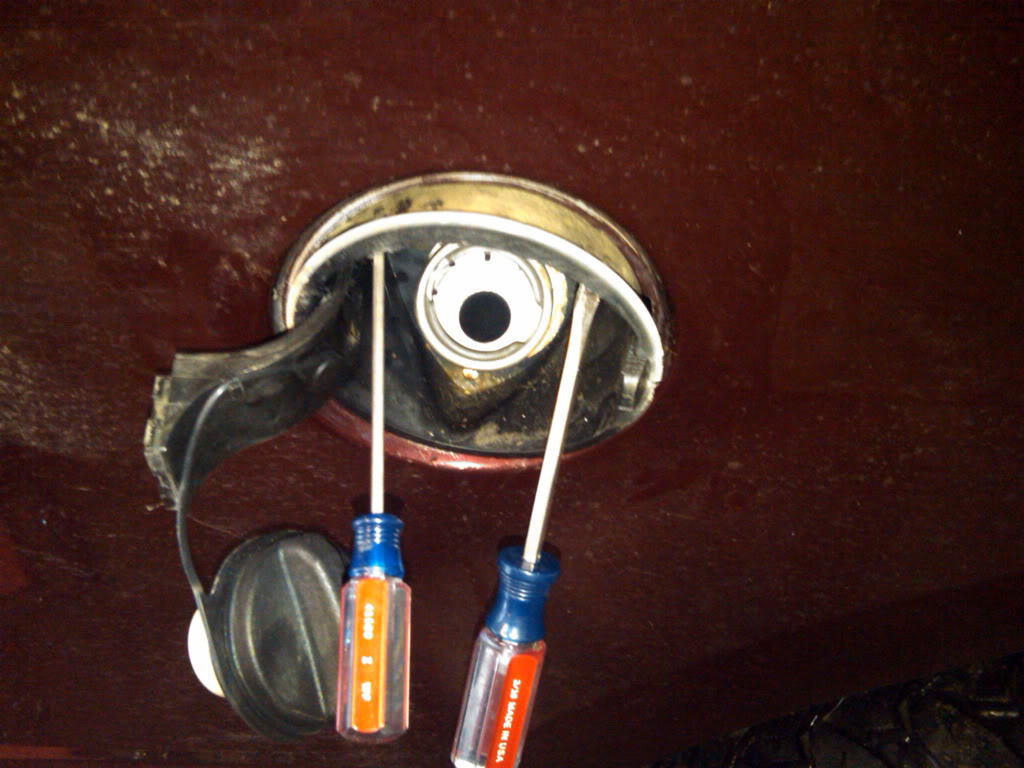
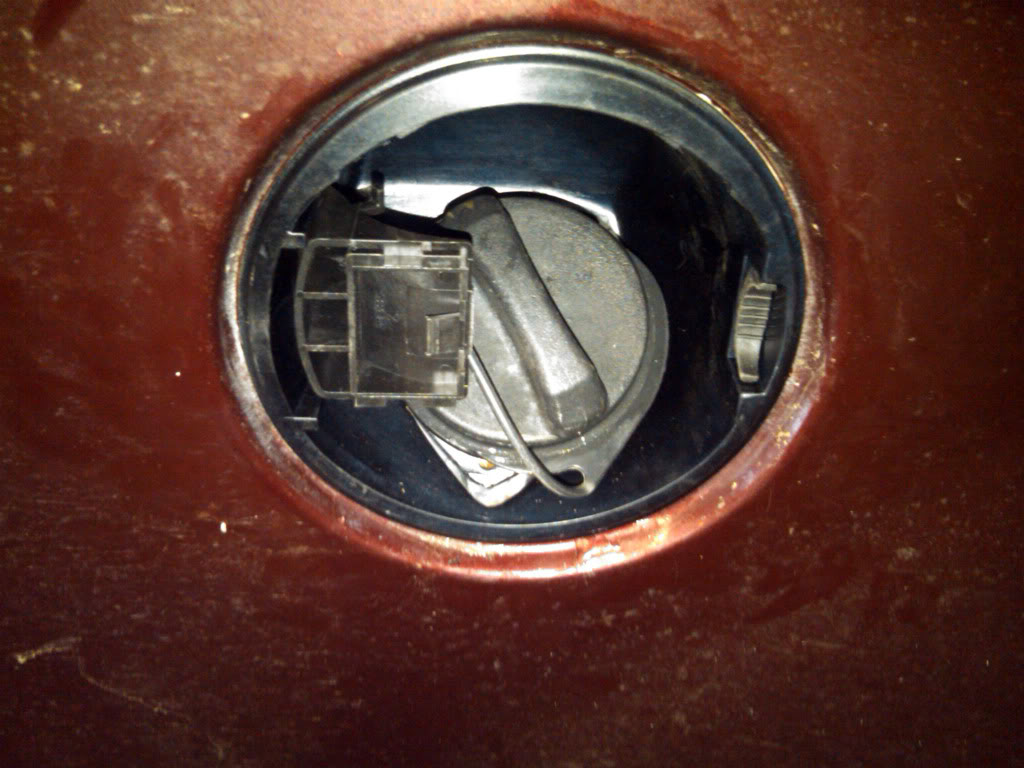
Find the two slots on the top of the housing and insert your two small screw drivers into them firmly so they stick in, lift up on the drivers with one hand and pull the housing assembly towards you. Using the hinge of the housing helps some. The east end of the housing facing the rear end of the truck needs to come out first, you remove it in a curve motion as the housing cubby hole is a large square shape.

Remove the fuel cap from the old hinge by pulling on the cord at a 45 degree angle. Re-install on the new hinge. Study the old and new housings together if you wish to.
Re-installation is reverse directions of removal. Just insert the cubby end/west end first, align it as needed, and push it into place firmly until it snaps in snug once it slides in.
Re-install the 7mm bolts ( coat them in some WD40 or PB Blaster for rust prevention if preferred ) and pull the filler neck with your index finger and thumb until aligned. Tighten down GENTLY, this is cheap plastic remember, torque down just enough with a free weight hand.
Re-install your fuel door cap the opposite of the removal process. Slip on, move back towards the truck, click, voila.
Clean your fuel cap if necessary for good measure to not risk any dirt particles entering the filler neck. I made sure mine was clean.
Broken fuel door replacement how-to concluded.
Photos were taken with my BlackBerry Storm2 9550, not the greatest photos. Plus the truck is filthy from January winter
Required Tools.
Replacement fuel door HOUSING assembly, part #4L3Z-9927936-BA
2 small flat head screw drivers.
A 7mm six point socket with a long extension ( 1/4" drive is safest ) Or a socket wrench screw driver
Optional Yet Useful
Mechanix gloves.
Work light.
The fuel door housing ran me $35 + tax at my local dealership.
First off, i'll show you why it failed. These aren't as superior as the '97 - '03 steel units, they are 100% plastic, fuel door cap and housing. There is this curved metal spring on the bottom of the exterior of the housing, the plastic mount on this piece breaks, therefor, you must replace the entire housing to fix the issue. Here is a compare photo from my old housing to the brand new one to show.
The design of this was a good one for the company to make some money profit come repair time IMO.
Replacement:
First, you must remove your fuel cap and hang it. Then with your 7mm socket remove the 3 bolts holding the fuel tank filler neck to the housing.
Second, remove your fuel door cap by inserting a small flat screw driver into the little slot between the door and plastic hinge. Push the screw driver towards the door cap and slowly, gently, pull it towards yourself and it will slide forward, as seen here.
Then pull it off gently.
I thank and credit Shifty219 for teaching me how to do this part and displaying how to before I attempted it on my own. In situations involving plastic, sometimes you just should not 'wing it'.
Find the two slots on the top of the housing and insert your two small screw drivers into them firmly so they stick in, lift up on the drivers with one hand and pull the housing assembly towards you. Using the hinge of the housing helps some. The east end of the housing facing the rear end of the truck needs to come out first, you remove it in a curve motion as the housing cubby hole is a large square shape.
Remove the fuel cap from the old hinge by pulling on the cord at a 45 degree angle. Re-install on the new hinge. Study the old and new housings together if you wish to.
Re-installation is reverse directions of removal. Just insert the cubby end/west end first, align it as needed, and push it into place firmly until it snaps in snug once it slides in.
Re-install the 7mm bolts ( coat them in some WD40 or PB Blaster for rust prevention if preferred ) and pull the filler neck with your index finger and thumb until aligned. Tighten down GENTLY, this is cheap plastic remember, torque down just enough with a free weight hand.
Re-install your fuel door cap the opposite of the removal process. Slip on, move back towards the truck, click, voila.
Clean your fuel cap if necessary for good measure to not risk any dirt particles entering the filler neck. I made sure mine was clean.
Broken fuel door replacement how-to concluded.


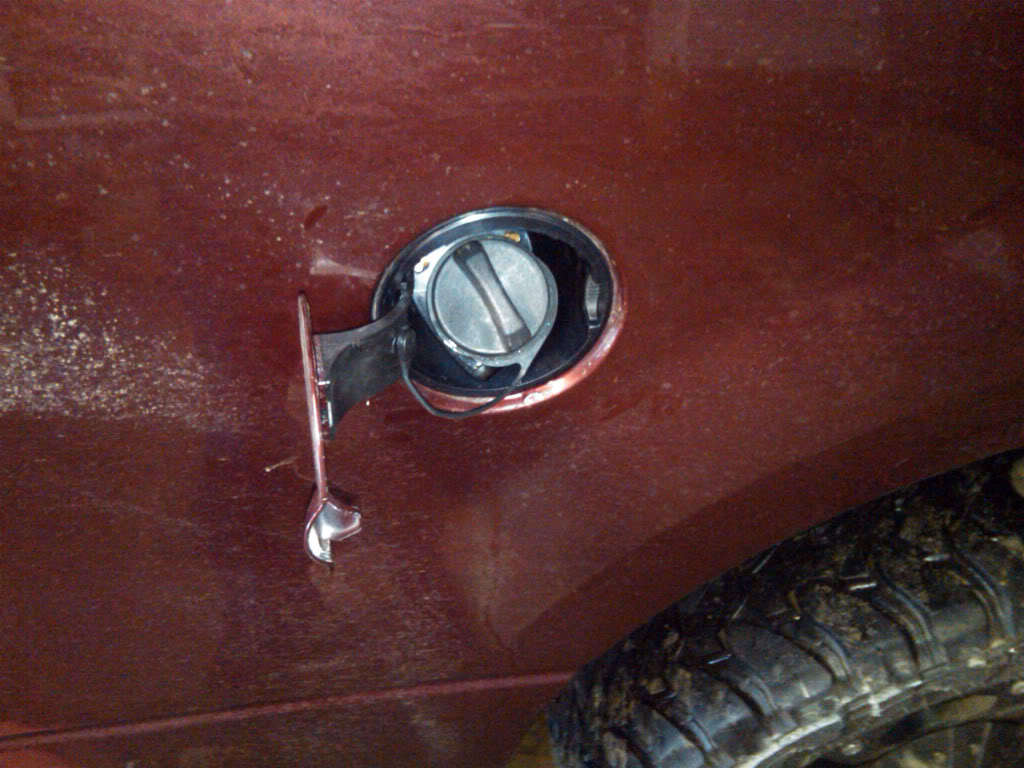
 Truck looks a lil cleaner in these pics
#6
01-31-2011, 08:48 PM

Senior Member
Join Date: Dec 2009
Location: Floresville, TX
Posts: 612
Likes: 0
Received 0 Likes
on
0 Posts
#7
02-01-2011, 02:36 AM

Junior Member
Join Date: Dec 2010
Location: Mason, WV
Posts: 5
Likes: 0
Received 0 Likes
on
0 Posts
Trending Topics

#9
02-07-2011, 08:58 AM

Senior Member
#10
02-07-2011, 12:58 PM

Junior Member
Join Date: Feb 2011
Location: San Antonio
Posts: 1
Likes: 0
Received 0 Likes
on
0 Posts
This is exactly what i have been searching for since this happened to my truck just the other day. I have one question though, will this work on my flareside truck or do i need a slighty different part? I took a look this morning and noticed the shape of the housing looked a little different. Any info will help thanks.
#11
02-10-2011, 10:24 AM

#12
02-10-2011, 09:40 PM

#13
02-11-2011, 04:09 PM
Thank you all for the comments and thankings! I was happy to had been able to help others.
As for Flaresides, they may just require a different replacement housing. I told my dealership the VIN to my truck and he ordered the part, and the posted part # is what my '04 styleside receives. All Stylesides will use this part. It might be different for flaresides. Though the only visual difference is the bump in the cap itself.
As for Flaresides, they may just require a different replacement housing. I told my dealership the VIN to my truck and he ordered the part, and the posted part # is what my '04 styleside receives. All Stylesides will use this part. It might be different for flaresides. Though the only visual difference is the bump in the cap itself.
#14
10-14-2011, 11:09 PM

#15
10-22-2011, 12:54 PM
Very good write up and good topic. This was a great help I had no idea that the door even came off the hinge.I was thinking I needed to get the replacement repainted when I ordered it but now i know that I can reuse my door and not repaint anything.Thanks Darren for this info.

