

Finally: Pics of my sub box and back bench

Thread Starter
|
Global Moderator &
Senior Member
Senior Member

Joined: Aug 2005
Posts: 21,337
Likes: 159
From: DFW
I only got to spend an hour and a half tops today including unload and clean up so i didnt get a whole lot done. Expect more finishing work tomorrow and hopefully all done with the exception of cutting the bores out for the subs by friday.
Best regards,
-Patrick
Best regards,
-Patrick
Thread Starter
|
Global Moderator &
Senior Member
Senior Member
Joined: Aug 2005
Posts: 21,337
Likes: 159
From: DFW
Latest update:

My best secret is if you take the drill attachment for screws, and use it not to drive the screw, but drill into the wood after your pilot hole to make a nice bore for the head of the screw to sit in for a flush fit without splitting the wood. And of course then drive the screw in by hand with screwdriver so you can stop imidiatley if you see the wood splitting.
My best secret is if you take the drill attachment for screws, and use it not to drive the screw, but drill into the wood after your pilot hole to make a nice bore for the head of the screw to sit in for a flush fit without splitting the wood. And of course then drive the screw in by hand with screwdriver so you can stop imidiatley if you see the wood splitting.


Thread Starter
|
Global Moderator &
Senior Member
Senior Member
Joined: Aug 2005
Posts: 21,337
Likes: 159
From: DFW
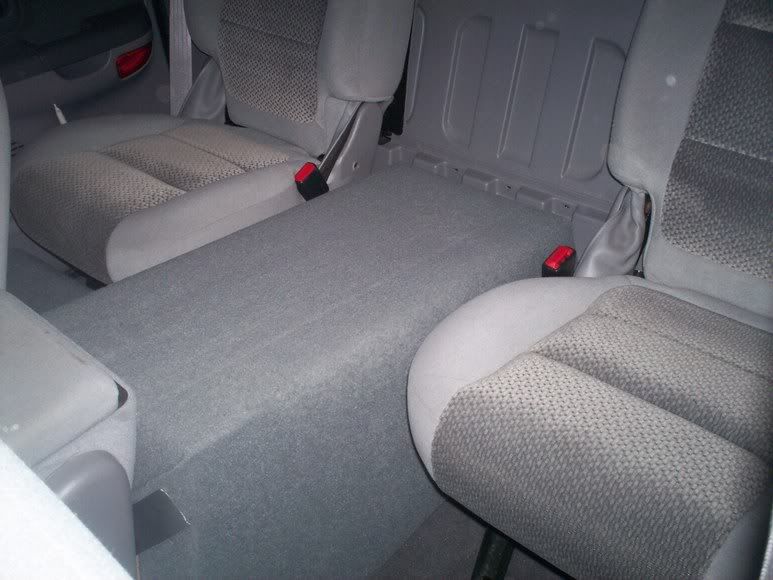
And then inside the truck


Hopefully i can get the rest finished off this weekend minus the actual sub bores, and maybe even get it upolstered.
Check back as you can,
-Patrick

Thread Starter
|
Global Moderator &
Senior Member
Senior Member
Joined: Aug 2005
Posts: 21,337
Likes: 159
From: DFW
yup  im still good friends with my HS shop teacher. I used some of the power tools that i dont own This is one time it pays to be nice to the teachers in school. He also helped me about two years ago when i was working on my eagle project.
-Patrick
im still good friends with my HS shop teacher. I used some of the power tools that i dont own This is one time it pays to be nice to the teachers in school. He also helped me about two years ago when i was working on my eagle project.-Patrick
Thread Starter
|
Global Moderator &
Senior Member
Senior Member
Joined: Aug 2005
Posts: 21,337
Likes: 159
From: DFW
Originally Posted by mesquillo10
If you get some good info, hook a brother up.
It is a 61 page and growing thread on another site so 56k warning.... It has a TON of pics

http://www.icixsound.com/vb/showthread.php?t=19654
I seriously spent close to an hour reading through it all


-Patrick
Thread Starter
|
Global Moderator &
Senior Member
Senior Member
Joined: Aug 2005
Posts: 21,337
Likes: 159
From: DFW
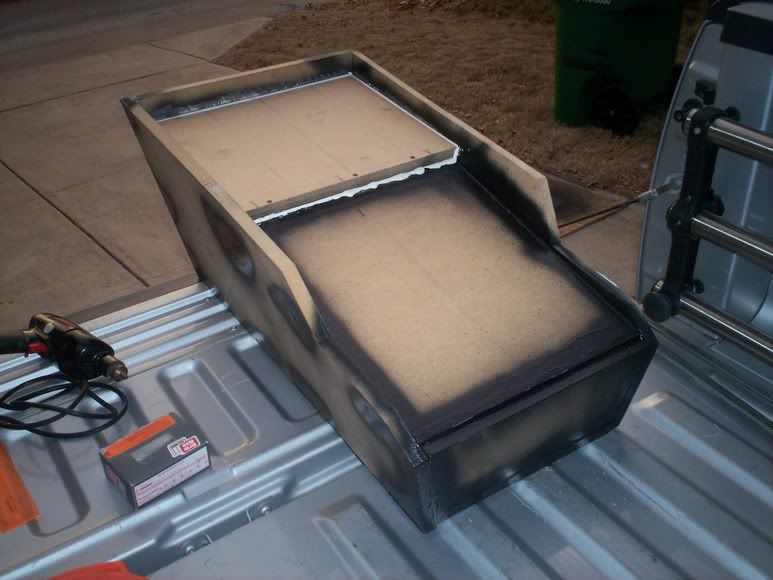
This is where im at now. I have finished half of the bottom, even tho im worried i will have to do some kind of flush mount work on the back half that i say ive finished. I am going to try and go back and make the front half of the bottom tomorrow. I have sprayed three coats of undercoating in there before i sealed it.
And now for the pics:


-Patrick
And now for the pics:
-Patrick
Thread Starter
|
Global Moderator &
Senior Member
Senior Member
Joined: Aug 2005
Posts: 21,337
Likes: 159
From: DFW
And then i wanted to see how it would look wrapped with carpet in the truck, so i ductaped the carpet on to the box after cutting the carpet a little
I am soo pleased with the way this is going to come out. I just wish i had a stronger cash flow for mods...
Anyways pics:

Then inside:

Oh and i made a sig picture the otherday, tell me what ya think
-Patrick
I am soo pleased with the way this is going to come out. I just wish i had a stronger cash flow for mods...
Anyways pics:
Then inside:
Oh and i made a sig picture the otherday, tell me what ya think
-Patrick
Thread Starter
|
Global Moderator &
Senior Member
Senior Member
Joined: Aug 2005
Posts: 21,337
Likes: 159
From: DFW

I did more sealing with undercoating, finally finished off my first can the other day, time to get some more, and i will just about have used the whole tube of liquid nails.
Hopefully i can finish it all out tomorrow... I am still scared i that i will have to do a flush mount on the back one which means more fabrication.... But for now i just want it to be done so i can get some carpet on it
-Patrick


Thread Starter
|
Global Moderator &
Senior Member
Senior Member
Joined: Aug 2005
Posts: 21,337
Likes: 159
From: DFW
Ouchh
Then i was struck by a bolt of lightning, Ok not really but i did have a really damn good idea pop up in my head.
Well i was planning on puttin the amp behind the back wall where the jack is stored.. Well then it all the sudden occured to me it would be totally badass if the amp was centered left to right and was just behind the end of the box, and i either made a fiberglass wall, or just cut an opening into the back wall.
Now i still dont have any components as of right now so i dont want to make an amp rack or cut too big of a window into that back plastic wall.
But here are some pics to help those that need a visual aid.


Those are all with box, without panel, and here is one without box without panel and without the dark grey carpet insert

Well i wish there was a better way to put my thoughts into a picture but i bet yall will get the idea,
Thanks for keepin up with this thread and encouraging me
-Patrick
Well i was planning on puttin the amp behind the back wall where the jack is stored.. Well then it all the sudden occured to me it would be totally badass if the amp was centered left to right and was just behind the end of the box, and i either made a fiberglass wall, or just cut an opening into the back wall.
Now i still dont have any components as of right now so i dont want to make an amp rack or cut too big of a window into that back plastic wall.
But here are some pics to help those that need a visual aid.
Those are all with box, without panel, and here is one without box without panel and without the dark grey carpet insert
Well i wish there was a better way to put my thoughts into a picture but i bet yall will get the idea,
Thanks for keepin up with this thread and encouraging me
-Patrick

Senior Member
Joined: Dec 2002
Posts: 1,005
Likes: 0
From: Fairfax, VA
Pat,
Nice job. It's good to see that some still take the time to do it right. I admire your patience with the box, and when finished it'll look better than a store bought unit. My only question whether or not you have any plans on fabricating some sort of cupholder(s) or a recess for holding misc. stuff for the back seat passengers?
SL
Thread Starter
|
Global Moderator &
Senior Member
Senior Member
Joined: Aug 2005
Posts: 21,337
Likes: 159
From: DFW
Ive had others asked me that and i dont plan to at this point, i am kinda thinking about making a second lighterduty box that has an arm rest and cupholders, and maybe a little box to put stuff in, that would simply just sit on top for road trips, but thats not a real concern of mine at the moment b.c its just my DD so i dont normally have more then one passanger.
I just got home from a friend's house where i lowered the front end of my truck two inches, maybe it will settle closer to three inches. So until saturday ive got a huge rake on the truck.
Im crashing now,
-Patrick
I just got home from a friend's house where i lowered the front end of my truck two inches, maybe it will settle closer to three inches. So until saturday ive got a huge rake on the truck.
Im crashing now,
-Patrick